3 Ways to Screenshot Samsung Galaxy A12 + Images – We are going to share how to screenshot the Samsung Galaxy A12, which is one of the most important functions of a Samsung Galaxy phone.
How to Screenshot Samsung Galaxy A12 + Images
There are many applications that can perform this function, but fortunately, you do not need to install any additional applications, as they are included with the Android 10 operating system.
Read more:
- How To Screenshot on Asus Laptop Windows 10
- 7 Easy Ways to Take Screenshots on a Laptop or Macbook
- How to Take Screenshots on Windows 10 Laptop PCs
- 4 Ways to Compress Photo Size Without Losing Quality
When you take a screenshot, you can send this conversation from WhatsApp, Instagram, Facebook photo, or video frame to your Samsung device’s memory.
Samsung Galaxy A12 specifications
Samsung Galaxy A12 is one of the most popular devices in our country due to its very attractive price.
- It comes with a 6.5-inch IPS display with a resolution of 720 x 1600p.
- This phone uses 4 GB of Ram and 64/128 GB of internal storage.
- There is a 48 MP and 5 MP camera on the back of the phone, and an 8 MP camera on the front with 2 MP quality.
- Using Android 10 Q as the operating system, the Samsung Galaxy A12 comes with a 5,000 mAh capacity battery.
- Processor -MediaTek MT6765 (Helio P35) is offered to users who want to:
You can use the following key combinations to take screenshots on your Samsung Galaxy A12 without installing any apps or software.
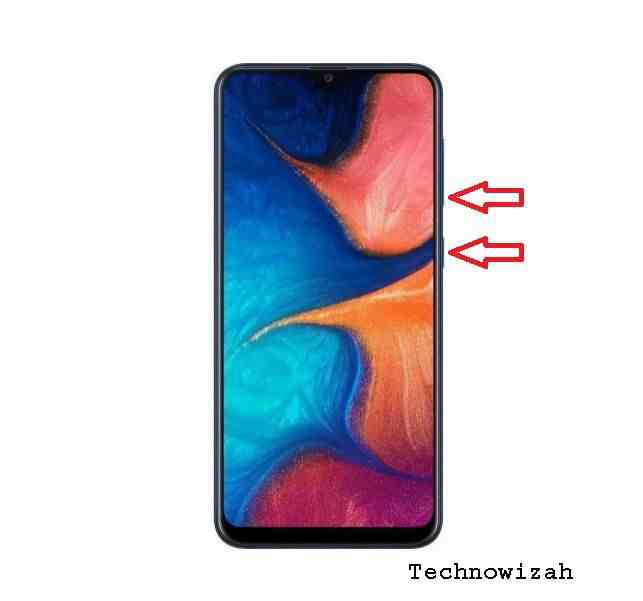
- First, place your Samsung A12 screen in the position you are looking for in the screenshot.
- Then press the Power and Volume Down buttons simultaneously.
- After a click, it means that the screenshot was successful
- To view the screenshot taken, open the gallery app
To use this feature, if you haven’t activated the Assistant menu, you must activate the Assistant menu in the following ways:
- To do this, first, go to the following path: Settings -> Accessibility -> Interaction
- Then tap the Assistant Menu button to activate it.
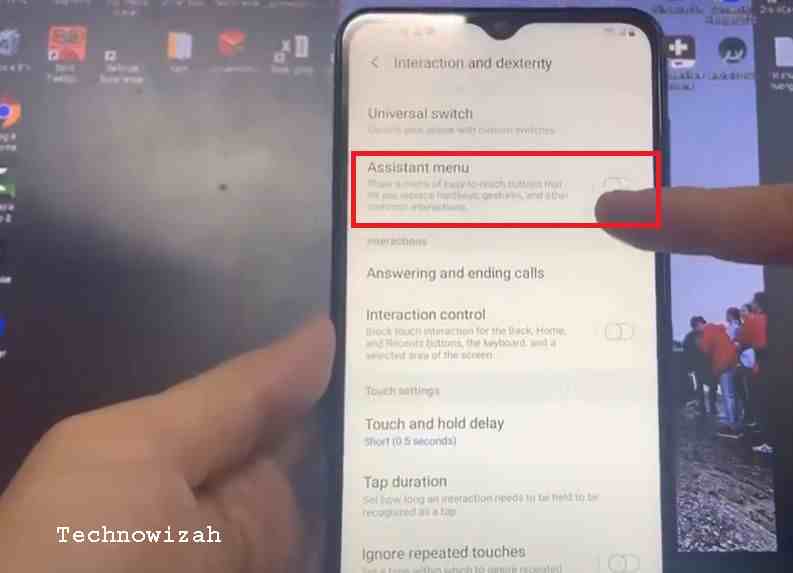
- Enable Assistant Menu on Samsung A12
- After enabling the menu assistant, tap the Menu Assistant option to display another menu from the menu assistant.
- Then on the Assistant menu options menu.
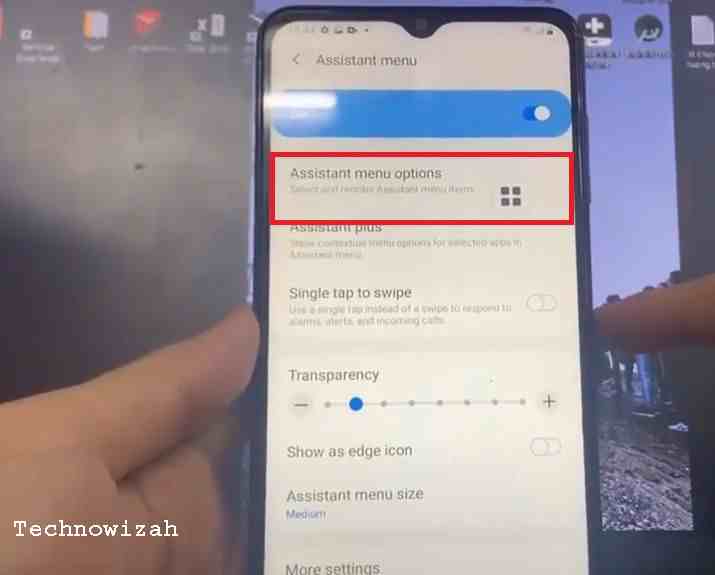
- Assistant menu options
- After the previous step, tap and hold the screenshot icon then move it up.
- Then place your Samsung A12 screen in the position you are looking for in the screenshot.
- After performing the previous steps, tap the Assistant menu icon that appears on the screen and select the Screenshot icon from the displayed options.
- The camera flash and shutter sound (if it is not silent) will be captured as screenshots.
- To access the screenshot taken, open the gallery app
#3. Take a Screenshot with Palm Swipe
- Press the Settings button.
- Press Advanced
- Enable the option Enable Palm for screenshots.
- After enabling this section, go to the screen that you want to take a screenshot of. Just move your palm slightly to take a screenshot
-Your device has saved the screen as an image.
You can access the screenshots that you have taken from the Photo (Gallery) section and the Screenshots section.
Read more:
- How To Screenshot on Asus Laptop Windows 10
- 7 Easy Ways to Take Screenshots on a Laptop or Macbook PC
- How to Take Screenshots on Windows 10 Laptop PCs
Conclusion:
This is an explanation of 3 ways to Screenshot Samsung Galaxy A12 + Images, you can directly share this image with your friends on social media accounts like Facebook, Instagram, and Twitter. To do this, just click on the Share icon after opening the screenshot.




![8 Ways to Fix The Hosted Network Couldn’t Be Started in Windows 10 [2026] 8 Ways to Fix The Hosted Network Couldn't Be Started in Windows 10](https://technowizah.com/wp-content/uploads/2021/07/8-Ways-to-Fix-The-Hosted-Network-Couldnt-Be-Started-in-Windows-10.jpg)
