7 Ways To View Computer Specifications in Windows 10 PC – There are several ways that we can use to see the type and specifications of the laptop being used. For Windows 10 users you can find this information on the settings page. Another way is to use diagnostic software such as dxdiag or third-party applications such as CPU-Z.

- 1 How To View Computer Specifications in Windows 10 PC
- 1.1 #1. See Computer specifications in Windows 10
- 1.2 #2. Using dxdiag (DirectX diagnostic tools)
- 1.3 #3. Using the System Information menu
- 1.4 #4. Using command prompt (cmd)
- 1.5 #5. Using PowerShell
- 1.6 #6. View the type and specifications of the laptop using the CPU-Z application
- 1.7 #7. Using the Memu emulator
- 2 Conclusion:
How To View Computer Specifications in Windows 10 PC
This information can be useful when you want to install a new program and want to confirm whether the hardware meets the minimum requirements. To speed up Windows 10 performance, understanding the specifications can help determine which hardware needs an upgrade.
Read more:
- 4 Ways To Disable Laptop Keyboard in Windows 10
- 8 Ways to Check VGA on Windows 10 PC Laptop
- How to Reinstall Original Windows 10 on PC Laptop
- 3 Ways To Remove Login Password on Windows 10
In Windows 10 there are several methods to view your laptop’s specifications starting from basic information such as system knowing BIOS or UEFI, laptop brand and series, device model number, processor speed, RAM capacity, VGA series, Windows version, and other specifications details.
#1. See Computer specifications in Windows 10
1. Go to the Settings menu on your laptop by clicking on the Windows button and then clicking on the gear icon.
2. Select the System menu.
3. On the bottom left tab, click the About menu.
4. In the tab view on the right you will see information about laptop specifications, Windows 10 version, CPU type, graphics card or GPU, and RAM capacity used.
5. Use the information obtained for your purposes.
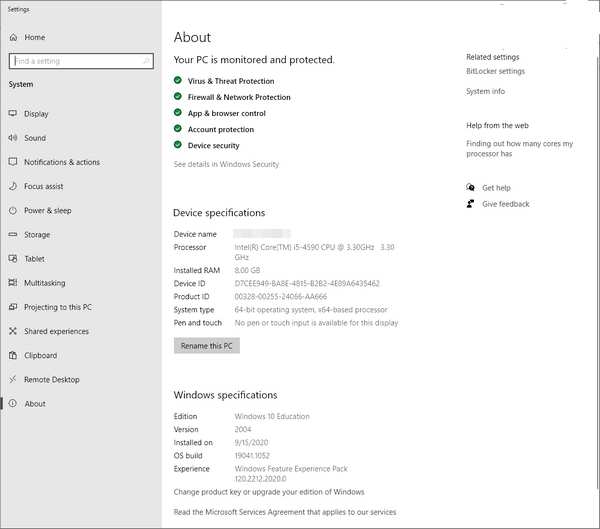
In the Device Specifications section you will see information about the hardware specifications of the laptop, namely:
- Device name > computer name information.
- Processor > processor specification, type, series, generation, number of cores, and speed.
- Installed RAM > RAM capacity installed on the laptop.
- System type > system architecture on a laptop (32-bit or 64-bit) is often also referred to as a laptop bit.
The Windows specifications section contains details about the Windows 10 series installed on your laptop, namely:
- Edition > Windows 10 edition information used (Home, Pro, Enterprise, Education).
- Version > Information of installed release updates.
- OS build > contains information about the installed Windows 10 build version.
#2. Using dxdiag (DirectX diagnostic tools)
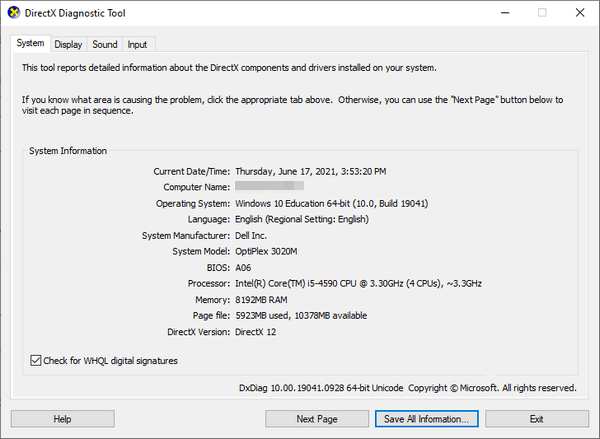
Furthermore, you can also check laptop specs using a feature called dxdiag which stands for DirectX diagnostic tools.
Using this method, you no longer need to install applications because every Windows 10 must have this tool in it.
- In the first step, you press the Windows key + R on the keyboard
- Then type: dxdiag
- Then click on the OK button
- The dxdiag program will open
- To see information about the laptop series and specifications, click on the System tab
- To see specifications for VGA or graphics card click on the Display tab
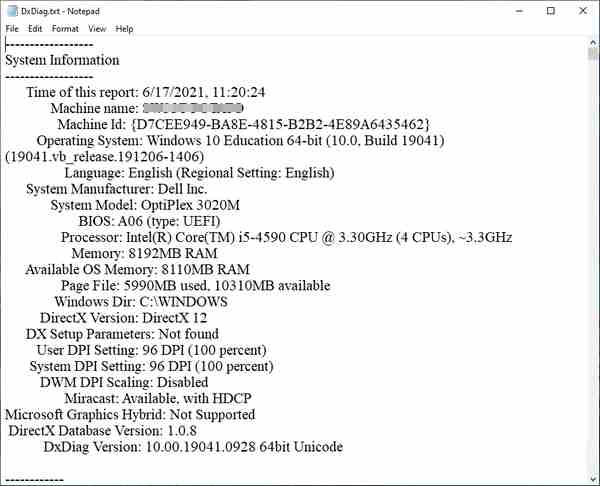
The specialty of using this method is that we can create a specification report in text form. The results of the report will contain complete information about the hardware and software on your laptop.
To create a spec report file in text form, click the Save All Information button at the bottom > select a storage folder.
The result will look like this:
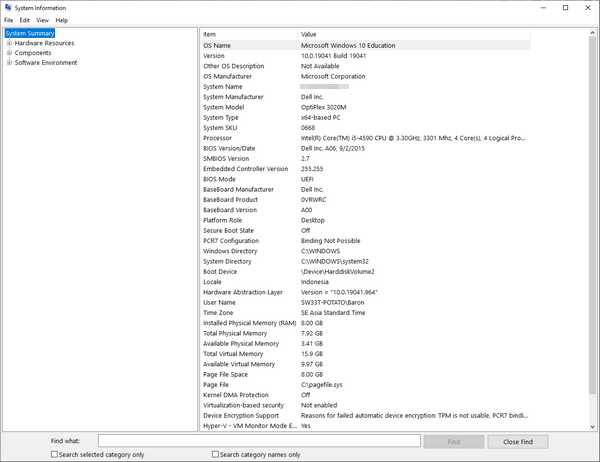
Windows 10 provides many features that you can use to check the series and type of laptop you are using. For this third method, we can use the menu in the Windows 10 settings, namely System Information.
- Click on the Windows button
- In the search field type: msinfo32
- A menu will appear when you select an application called System Information
- Once the application is open click on the Summary tab
- There you will see information about the Windows version, laptop series, and brand, as well as information about laptop hardware specifications
- To see VGA specs click on the Components menu then select Display
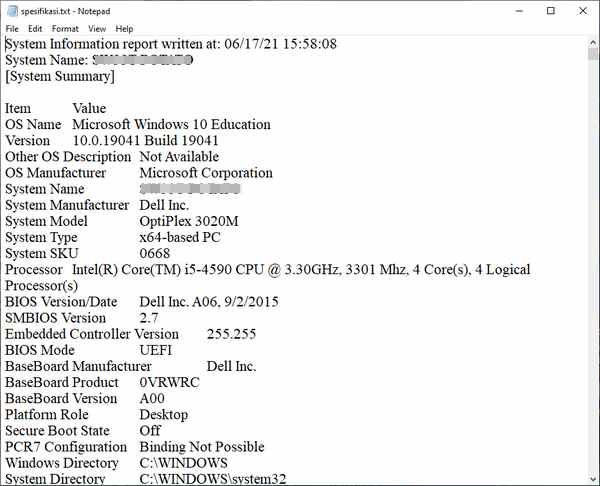
Similar to the previous method, you can also create a specification file in txt format. You can save this file and use it for technical problems at a later date.
How to make it very easy, on the System Information page click the File menu > Export > select a storage folder.
When finished you can check the txt file that was created, its contents will more or less look like in the image below.
#4. Using command prompt (cmd)
To find out the specifications of the laptop, you can also use cmd in Windows 10.
Cmd or command prompt is a console program that functions to execute commands on Windows, just like terminal applications on Linux and macOS.
With this program, many things can be done, including checking the type of laptop that is being used.
How to see laptop specs with cmd:
- Your first step is to open cmd in Windows 10 with administrator access, how to click on the Windows button then type: cmd
- On the menu that appears click on Run as administrator
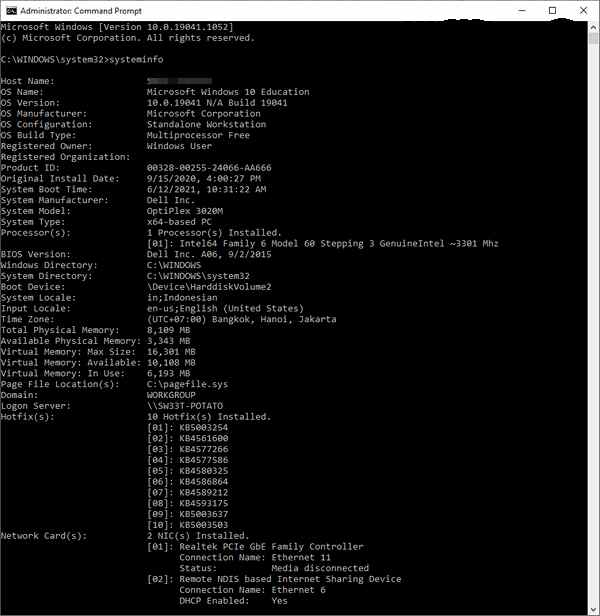
- In the cmd program type the following command: system info
- Press the Enter key
- Information about laptop specifications will appear on the cmd screen
#5. Using PowerShell
Powershell is a Windows 10 default program that has a function similar to cmd, which is to run commands with the console.
You can also use it to find out the specifications, types, and brands of laptops.
- The first step click on the Windows button
- Type PowerShell in the search field
- On the menu that appears, click the Run as Administrator menu
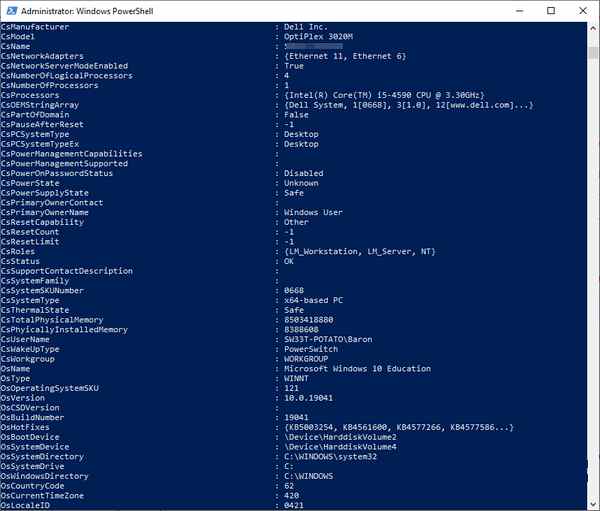
- In the Powershell, program type the following command: get-computer info
- Press Enter
- Information regarding laptop specifications and operating system will appear on the screen
#6. View the type and specifications of the laptop using the CPU-Z application
In addition to the five ways above that are done with the built-in features in Windows 10, you can also view laptop specifications using third-party diagnostic programs. One of the light and good programs is CPU-Z.
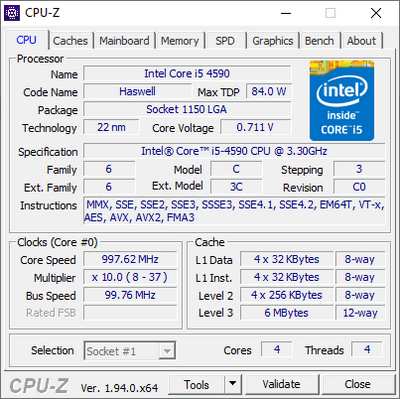
This application can detect all the hardware on the laptop and display it completely.
There is currently a portable version available so there is no need to install the application, just download and run it and all information about the laptop will be visible.
- Your first step is to download CPU-Z here: https://www.cpuid.com/softwares/cpu-z.html
- Choose the portable version if you don’t want to install the application
- After the download is complete, extract the file first
- Then open the extracted folder, in which there is a CPU-Z application with 32-bit and 64-bit versions. You choose the one that suits your laptop’s bit architecture
- Open the CPU-Z program by double-clicking it
- Wait until the detection process is complete
- Information about the specifications and type of laptop will be displayed in the application
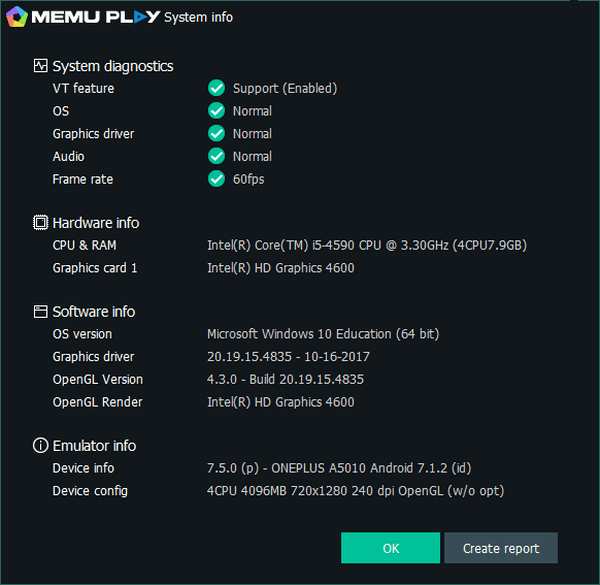
#7. Using the Memu emulator
As an alternative, there is one more way that you can use to see a summary of the hardware specifications on your laptop, which is using the Memu emulator.
In this application, there is a system info feature that can detect important specifications, especially for gaming purposes. You can use this method if you have installed Memu on your laptop.
- Open the Memu emulator app on your laptop
- Wait until the loading process is complete and go to the main page
- Click the menu button in the upper right corner of the application
- Select System info
- Information about laptop specifications will appear on the screen
- To create a report in text form click on the Create Report button
Conclusion:
Those are some ways to see the type, series, brand, and hardware specifications of laptops in Windows 10. You can choose whichever method is easiest as you wish.
![8 Ways to Fix The Hosted Network Couldn’t Be Started in Windows 10 [2026] 8 Ways to Fix The Hosted Network Couldn't Be Started in Windows 10](https://technowizah.com/wp-content/uploads/2021/07/8-Ways-to-Fix-The-Hosted-Network-Couldnt-Be-Started-in-Windows-10.jpg)


