How To Fix Destination Folder Access Denied Windows 10 PC 2026
6 Ways to Fix Destination Folder Access Denied Windows 10 PC – Do you receive a “destination folder access denied” message when trying to access a specific folder or file? Here are some ways to fix this problem.
👉 Read Also:
- 8 Ways to Fix TDR VIDEO FAILURE Nvlddmkm.sys on Windows 10
- 5 Ways to Turn Off Cortana in Windows 10 (100% Working)
- 2 Ways to Fix Broken, Corrupt Videos on Windows PC
- What Is The Difference Between a Virus And Malware
You might find it weird when Windows tells you that you don’t have permission to access something on your computer. Usually, this is the result of configuring permissions in the NTFS file system that Windows uses by default.
If you receive an Access is denied message in Windows 10 when trying to access a file or folder, there is no need to worry. Because this time we will discuss how to solve the destination folder access denied in Windows 10.
#1. Make sure the user has administrator rights
In most cases, you have to be an administrator on your PC to make changes to the ownership of files/folders. You may be able to change permissions in your directory, but you won’t have much access or control elsewhere.
To maintain the confidentiality of everyone’s files on the computer. Only administrators can access files belonging to other users. Also, you have to give admin permission to make changes to system files, such as those in the Program Files and Windows folders.
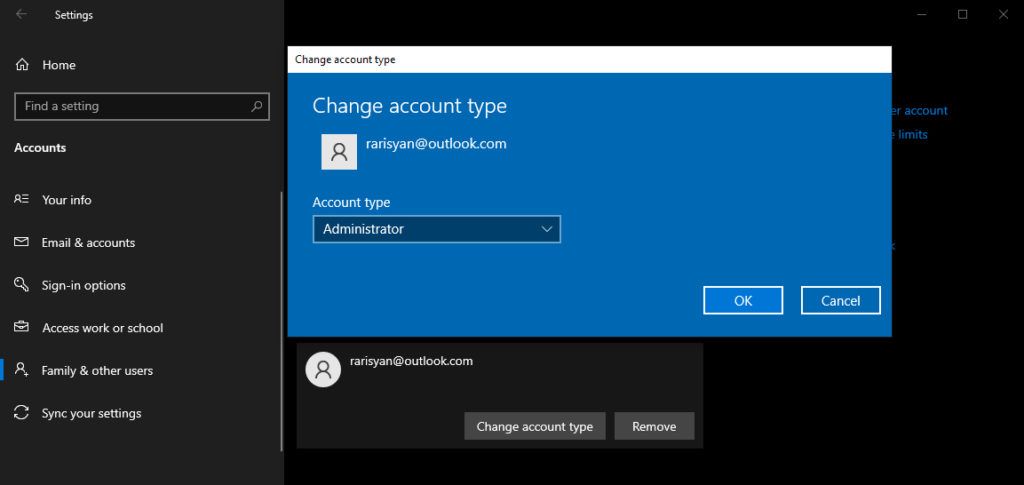
If you want to upgrade your standard account to an admin account, other admins need to visit Settings > Accounts > Family & other users. Select your account under Your family or Other users and click Change account type. Change from Standard User to Administrator and you will have full access rights on your Windows 10 operating system.
#2. Change File Ownership Settings
The most common fix you can try when you see the “destination folder access denied” message is to take ownership of the folder via File Explorer.
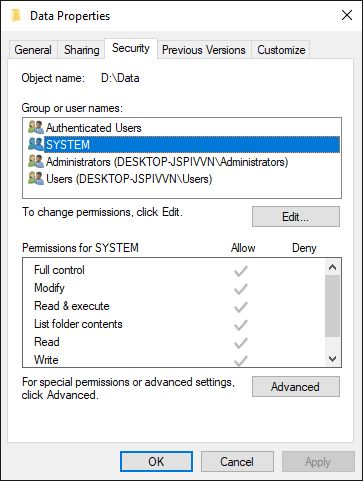
Here’s how to do it. First, right-click the folder or file in question and select Properties. In the resulting window, switch to the Security tab. Next, click the Advanced button for more options.
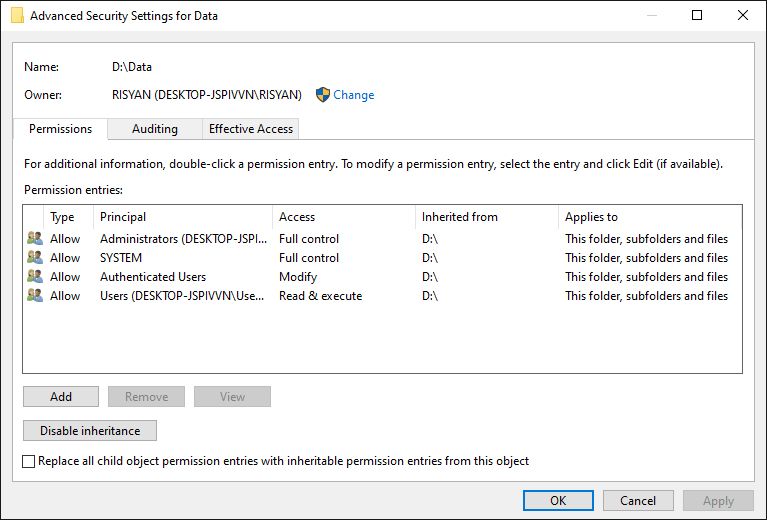
At the top of the next window, you will see a field labeled Owner. It will likely give an Unable to display current owner message if you run into problems. Click the blue Change link next to this to fix it, note that you have to be an administrator to do this.
Now you will see a dialog box titled Select User or Group. In it, enter the account name of the new folder owner. This can be an account username or a group of users on your PC.
Groups include standard units such as Administrators (if you want all computer admins to have them), or Users (for everyone to have). In-home use is usually the most sensible choice to assign ownership to one person.
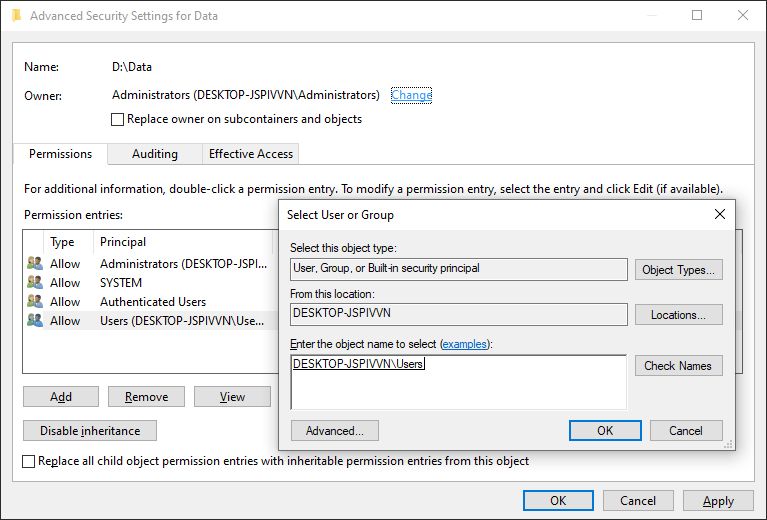
Here I assume that you want to take ownership of the folder with your account, so type your username here. If you use a Microsoft account to sign in to Windows 10, your username is the first five letters of your email address. Hit Check Names when you’re done to make sure it’s correct. If yes, it will automatically change to [ PC Name ]\[ User Name ]. Click OK.
Note: Be careful when changing file ownership settings
When handling the “access denied” error, you should apply the steps above carefully. Avoid taking ownership of folders in system directories such as Windows, Program Files, Program Data, or similar.
Doing so will weaken the security of your system, as normal accounts are not meant to be the owners of this directory. They contain important Windows folders that you shouldn’t touch. You can still gain access to most of these folders by navigating to them in File Explorer. You have to confirm admin permissions, then you can view them without being the owner.
#3. Review Folder Permissions
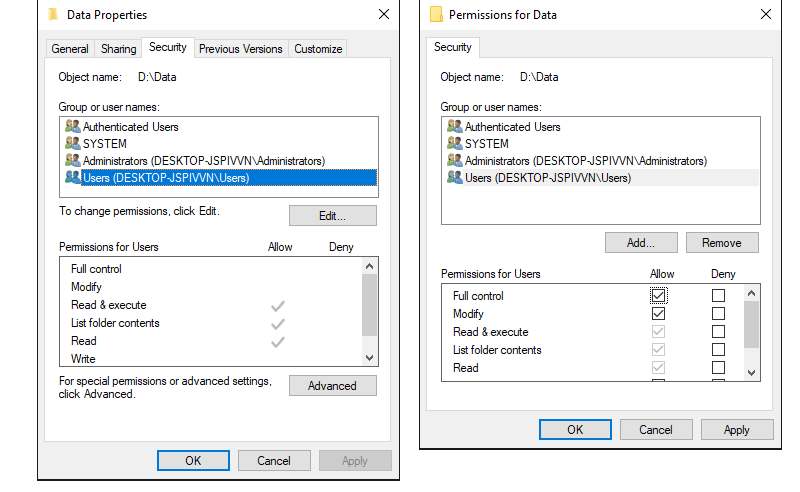
If taking ownership of a folder doesn’t work, or you’re an administrator trying to grant permissions to someone else, you should review what users have permissions on the folder in question.
Drag the same Security tab in the Properties folder as before. At the top, you will see a list of users and groups on your PC. Select an entry here, and the bottom pane will show what permissions they have for this folder. Hit the Edit button to change the permissions for each user to your liking.
As you would expect, Full control gives you complete control over the folder and everything in it. Read is the most restrictive option, as it only lets you see what’s in the folder. See Microsoft’s page on file and folder permissions for more detailed details.
#4. Double Check Antivirus Settings
Sometimes, your antivirus can get overzealous and end up messing with your ability to access files. If you have confirmed that everything is correct with your file permissions above, you may consider testing this next.
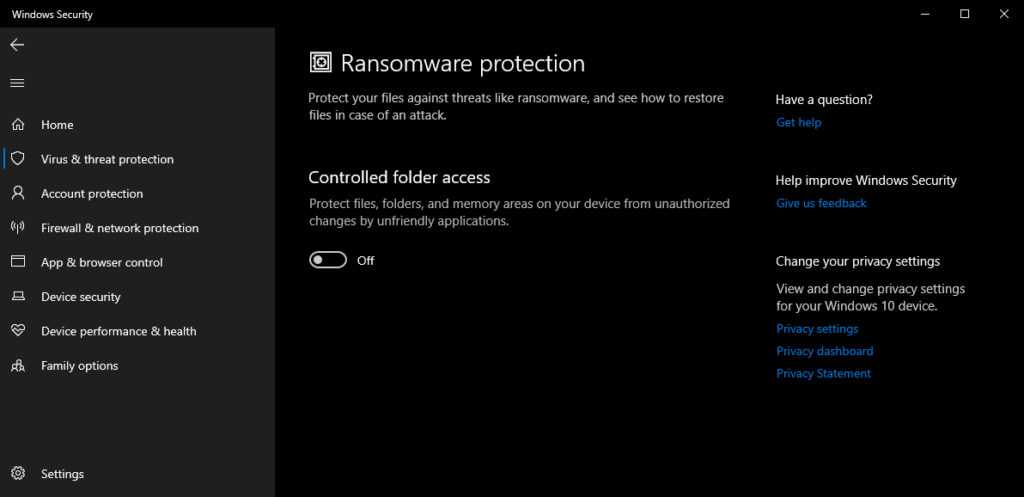
Look around the settings of your antivirus program and see if there is a file protector or similar setting. Try disabling this and then try accessing the file again. If it doesn’t have any effect, temporarily disable your antivirus completely and see if that helps.
#5. Check File Encryption
Another reason you may receive a “destination folder access denied” message is that the contents of the folder are encrypted. As you know, encryption protects files by only allowing someone who has the key to view them.
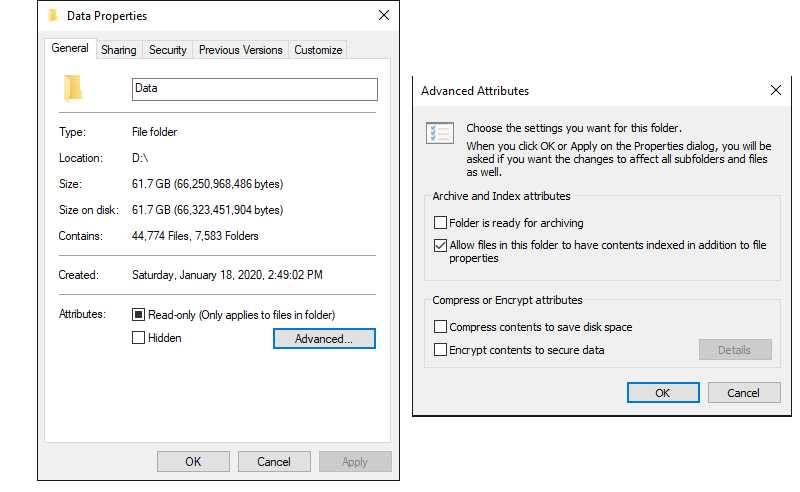
You can encrypt folder contents in Windows, although this feature is only available in the Professional version. To do so, right-click the folder and select Properties. In the window that appears, click the Advanced button on the General tab. Here, check the Encrypt contents to secure the data box. With this, everything in the folder will be locked.
This type of encryption is transparent, meaning that the owner never pays attention to the encryption. As long as they are logged into the system, they can access these files.
But if you don’t have the certificate used to encrypt the folder, Windows will deny you access. Whoever encrypts the file must open it. This isn’t the only way to encrypt files in Windows 10, but it can cause the error message you’re seeing.
#6. Disable User Account Control
The above solution is the most important solution to solve the “destination folder access denied” problem in Windows 10. You will see a lot of suggestions floating around the web for this problem, but not all of them are good. Some of them just give you solutions to get administrator permissions, which we discussed.
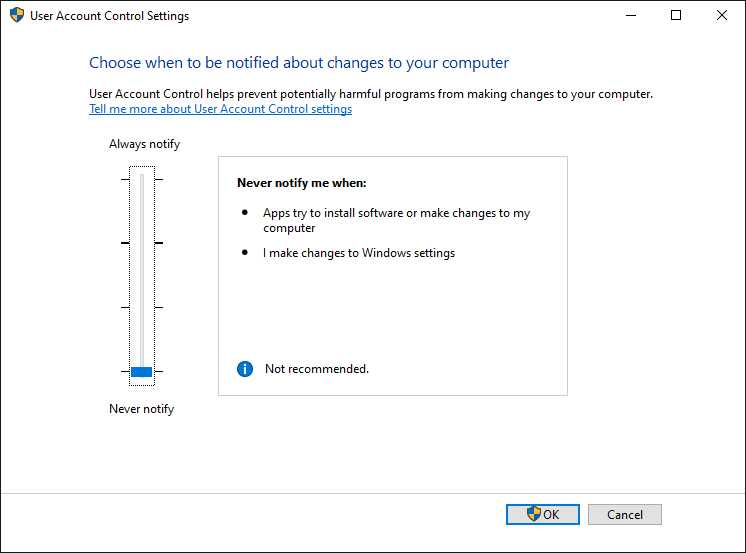
One of the other commonly used solutions for dealing with the “destination folder access denied” issue is to disable User Account Control (UAC). To do this, type UAC in the Start menu search bar and select Change User Account Control settings. Drag the slider down and hit OK.
Once you’ve done that, try to follow the 2nd solution above again to take ownership. Once done, make sure to reset the UAC settings to their default.
👉 Read Also:
- 5 Ways to Fix UEFI Firmware Settings Not In Windows 10
- 3 Ways to Check MBR or GPT Partition Type in Windows 10
- What Is A Bootloader And How Does It Work? Complete Guide
Conclusion:
Now you know how to solve the destination folder access denied in Windows 10. Usually, this problem can be solved by changing simple permissions. Make sure you have administrator rights, then you can try to take ownership and adjust permissions as needed. Avoid changing the ownership of the protected system folder, which can compromise the security of your system.
![8 Ways to Fix The Hosted Network Couldn’t Be Started in Windows 10 [2026] 8 Ways to Fix The Hosted Network Couldn't Be Started in Windows 10](https://technowizah.com/wp-content/uploads/2021/07/8-Ways-to-Fix-The-Hosted-Network-Couldnt-Be-Started-in-Windows-10.jpg)
