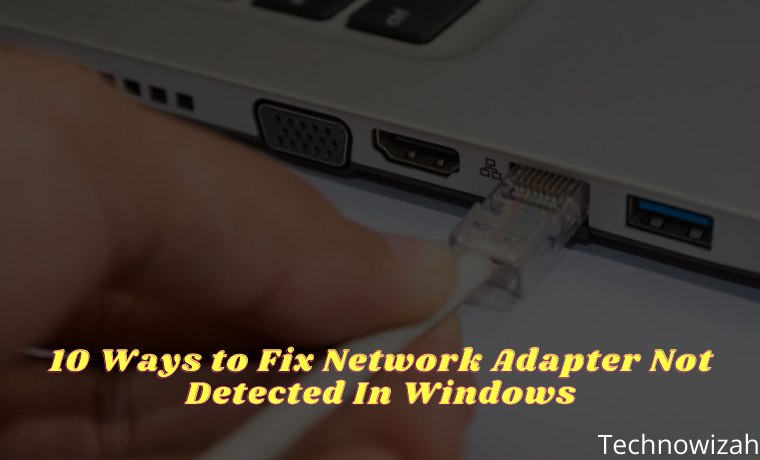
10 Ways to Fix Network Adapter Not Detected In Windows – Without a network adapter, you will not be able to connect to the internet. Learn how to fix an undetected or missing network adapter so you can get back online again.
- 1 10 Ways to Fix Network Adapter Not Detected In Windows 10 PC
- 1.1 #1. Restart And Check the Connection
- 1.2 #2. Show Hidden Drivers In Windows
- 1.3 #3. Remove the Battery From the Laptop
- 1.4 #4. Turn off Antivirus and VPN
- 1.5 #5. Run Network Adapter Troubleshooter
- 1.6 #6. Use the Network Reset Tool
- 1.7 #7. Check Power Management Settings
- 1.8 #8. Reset Winsock Settings
- 1.9 #9. Clean Network Devices
- 1.10 #10. Check Windows Background Services
- 2 Conclusion:
10 Ways to Fix Network Adapter Not Detected In Windows 10 PC
The network adapter is an important part of a computer because it sends and receives data to and from other devices on a wireless or wired network. Sometimes, the network adapter disappears from the Device Manager or the Windows operating system tells you that it is missing.
Read more:
- 8 Ways to Fix The Hosted Network Couldn’t Be Started in Windows
- 6 Ways to Fix Download Failed Network Error in Chrome
- What Is NAS (Network Attached Storage) And Why Do I Need One
- Types of Wireless Networks and Their Advantages and Disadvantages
When this happens, you will no longer be able to connect to the internet. To help you fix it, we have put together a few solutions that you can try to fix an undetected or missing network adapter.
#1. Restart And Check the Connection
Try some quick fixes like restarting your PC or laptop and checking if you can now find the missing network adapter. If you have already connected the Ethernet cable, you will also need to unplug it and plug it back in.
#2. Show Hidden Drivers In Windows
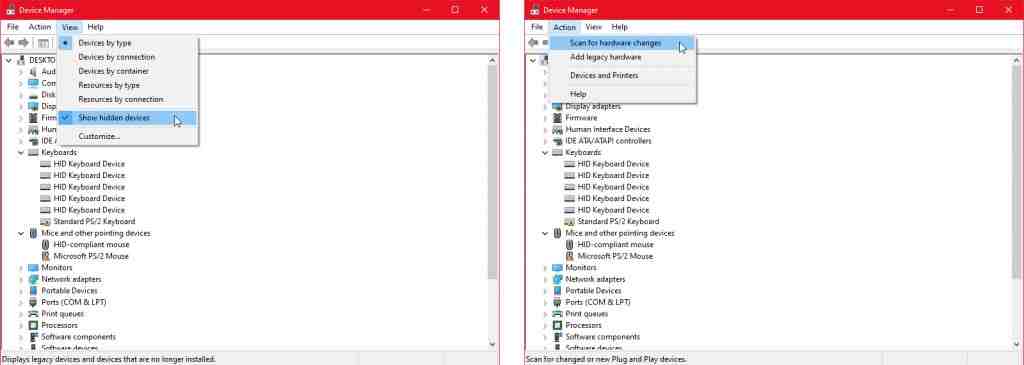
The network adapter may be missing simply because the Device Manager does not display it. Here’s how to make the network adapter visible:
- Right-click Start > Device Manager.
- Open the View menu and click Show Hidden Devices.
- Expand the list of Network adapters and check if the adapter is now visible.
- If the adapter is still missing, click Action > Scan for hardware changes.
#3. Remove the Battery From the Laptop
If you’re on a PC, or your laptop doesn’t have a removable battery, skip this solution. While removing the battery you are forcing the motherboard to reset its settings which might be enough to fix this issue.
If your laptop comes with a removable battery, turn it off and remove the battery for a few seconds. Then, plug it back in and turn on the laptop again.
#4. Turn off Antivirus and VPN
If you are using a VPN on your device, try turning it off or even uninstalling it. Then, restart your laptop or PC and check if there is any difference. Do not forget, to also turn off the antivirus or check for available updates.
#5. Run Network Adapter Troubleshooter
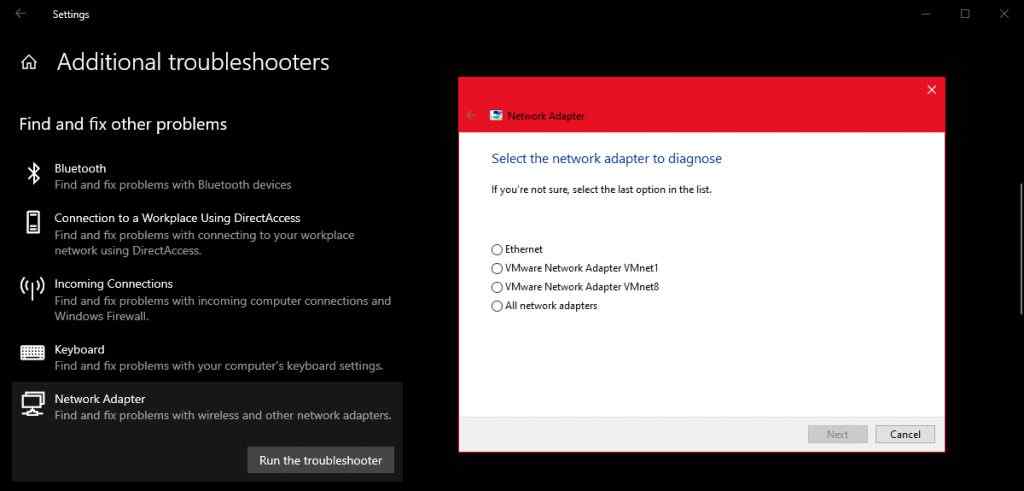
Windows 10 provides a useful list of troubleshooters so it’s no surprise that you can fix some network adapter problems using one of these tools. Follow these steps to run the Network Adapter troubleshooter:
- Right-click Start and select Settings, or use the keyboard shortcut Win + I.
- Go to Update & Security > Troubleshoot > Additional troubleshooters.
- Under Find and fix other problems, select Network Adapter > Run the troubleshooter.
- Follow the instructions shown.
#6. Use the Network Reset Tool
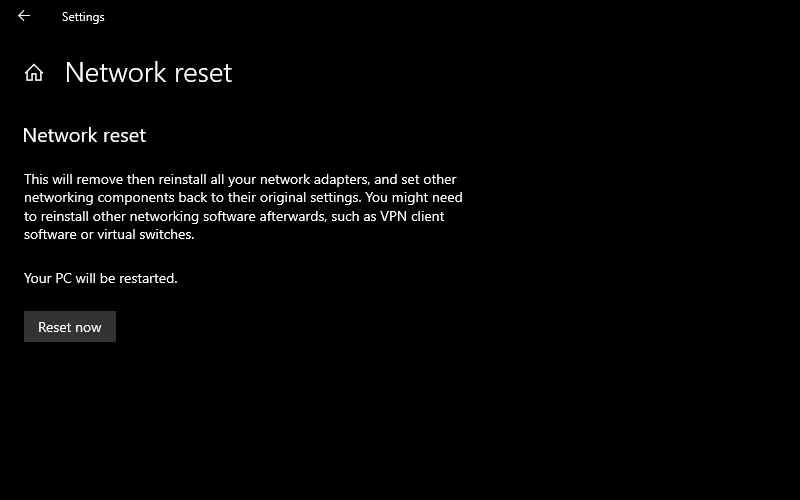
If the troubleshooter doesn’t solve the problem, you can try using the Network Reset Tool. This will make all network settings back to their default settings without disturbing your data. Follow these steps to reset your network:
- Go to Settings, then go to Network & Internet.
- Select Status and scroll down to Network reset.
- Select Reset now.
#7. Check Power Management Settings
If you are using a laptop, Windows 10 will turn off some of its features when the battery is low or when battery saver mode is activated. Follow these steps to check the Power Management settings :
- Right-click Start > Device Manager.
- Expand the list of Network adapters
- Right-click your network adapter and select Properties.
- Go to the Power Management tab.
- Uncheck Allow the computer to turn off this device to save power.
- Click Apply > OK to save changes.
#8. Reset Winsock Settings
Winsock is the programming interface and supporting programs that define how Windows network software uses its network services. If something goes wrong with the Winsocks file, it can cause the network adapter to disappear from Windows 10. Here’s how to reset Winsock data:
- In the Start menu search bar, look for the command prompt and select Run as administrator.
- Inside the Command Prompt window, type netsh winsock reset. Then, press Enter.
- Restart your PC or laptop to save changes.
#9. Clean Network Devices
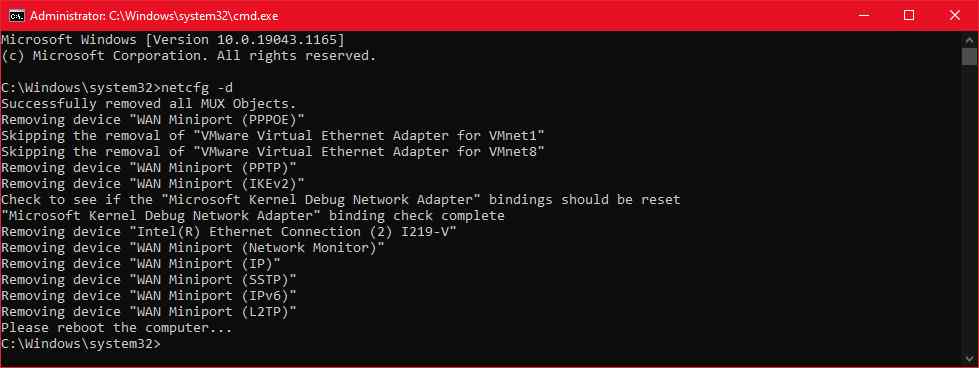
If the previous method didn’t work, you can follow these steps to clean network devices using the command prompt:
- Press Win + R to open the Run window.
- Inside the Run window, type cmd and press Ctrl + Shift + Enter to run Command Prompt as administrator.
- In the Command Prompt, type netcfg -d.
- Restart the device and check if you can now find the network adapter.
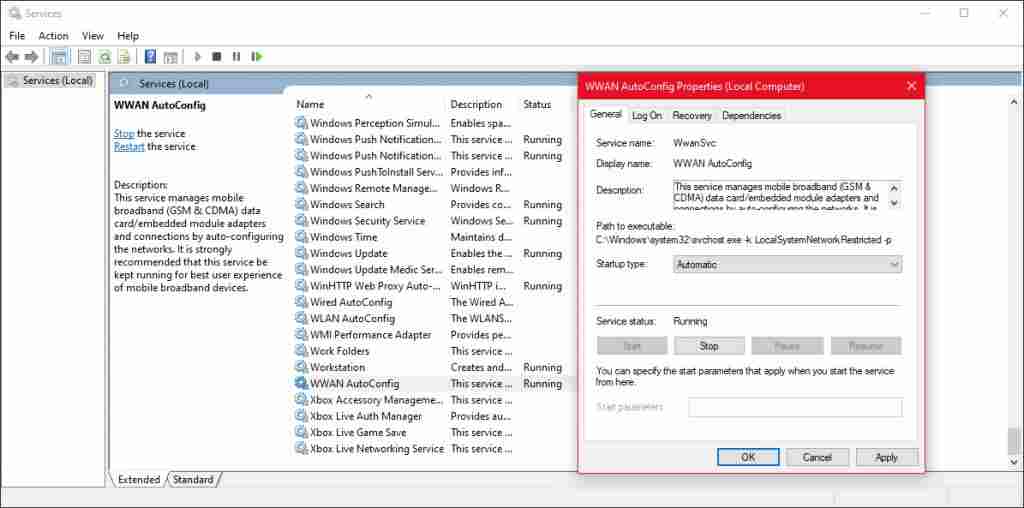
#10. Check Windows Background Services
Your network driver may be missing because the background service stopped working properly. Follow these steps to manage it manually:
- In the Start menu search bar, search for services and select the most suitable one.
- In the Services menu, locate and open WWAN AutoConfig.
- Check if the Service status is Running. If not, click Start to run it.
- Set the Startup type to Automatic.
- Click Apply > OK to save changes.
- Restart your device and check if the missing driver is now available.
Read more:
- 9 Ways to Fix No WiFi Networks Found Windows 10 PC
- 3 Ways To Know Wifi Password In Windows 10 PC
- Wi-Fi is Often Disconnected on Laptops Here Is The Solution
Conclusion:
So that’s how to fix the network adapter that is not detected or missing. There are many solutions available. As we discussed, you can try turning off your VPN or antivirus and Windows 10 also has some troubleshooting tools you can use.

![8 Ways to Fix The Hosted Network Couldn’t Be Started in Windows 10 [2026] 8 Ways to Fix The Hosted Network Couldn't Be Started in Windows 10](https://technowizah.com/wp-content/uploads/2021/07/8-Ways-to-Fix-The-Hosted-Network-Couldnt-Be-Started-in-Windows-10.jpg)
