6 Ways to Fix Error 0x80070091 in Windows 10 PC – Are you unable to complete the System Restore process and suddenly your Windows operating system displays an error message 0x80070091? If so, you need not worry. Because this time we will discuss how to solve errors 0x80070091 in Windows 10, 8, and 7.

Why Windows 10 System Restore Doesn’t Complete?
The problem of System Restore failing could be due to an antivirus error. But it’s also possible that the problem has something to do with the WindowsApps folder. Basically, when error code 0x80070091 appears, it means the destination directory is not empty.
Read more:
- 7 Ways to Fix Error 0x80070422 in Windows 10 PC
- Fix Nvidia Geforce Experience Error 0x0003 on Windows 10 PC
- Best Ways to Fix Error 0x800F081F in Windows 10 PC
- 7 Ways To Fix Error Code 0xC0000225 In Windows 10 PC
In other words, the System Restore process recognizes that the supposedly empty WindowsApps folder has content instead. It’s also possible that the anti-virus is blocking the process or the error has something to do with Sync Settings. Here are some of the causes of error 0x80070091:
- Windows 10 System Restore did not complete successfully – This is the most common error message related to System Restore. Make sure you try one of the solutions below to fix this problem.
- 0x80070091 Windows 7 – It is possible that the same error message appears in earlier versions of Windows. So, if you are not using Windows 10, don’t worry because this method also works on Windows 8.1 and Windows 7.
- System Restore encountered errors: unexpected errors and unknown errors – In some cases, corrupted system files cause problems interfering with System Restore. So, it is best to check the system for file corruption.
- System Restore failed due to antivirus – Error 0x80070091 can also appear due to anti-virus. Your security apps can interfere with your operating system, preventing it from reverting to a previous restore point. If you want to learn how to fix System Reset that failed due to an antivirus error, make sure you check the solutions below.
It’s quite difficult to pinpoint the exact cause of the error, but the important thing is that Microsoft has figured out the problem. The company also promises to release a foolproof solution to this problem.
In the meantime, the best step you can take is to follow the instructions below. While this method is designed to fix errors in Windows 10, it also applies to older versions of the operating system.
How to Fix Error 0x80070091 in Windows 10 Laptop PC
#1. Boot Into Safe Mode And Rename WindowsApps
- Boot your PC into Safe Mode.
- Right-click the Windows icon, then select Command Prompt (Admin) from the list.
- Paste the following commands one by one:
- cd C:\Program Files
- takeown /f WindowsApps /r /d Y
- icacls WindowsApps /grant “%USERDOMAIN%\%USERNAME%”:(F) /t
- attrib WindowsApps -h
- rename WindowsApps WindowsApps.old
- Reboot your computer.
- Try running System Restore again and check if the error is fixed.
#2. Check for Anti-Virus
Anti-virus applications do provide protection on computers from attacks and threats. On the other hand, they can also interfere with Windows systems and cause error 0x80070091. If you are experiencing the same problem on your computer, it is recommended to disable certain features on your anti-virus. They may be able to prevent other applications from accessing certain directories.
If you have tried this method and the error persists, then the best way is to disable your anti-virus completely. If you find that your anti-virus app is causing the problem, it might be the best time to uninstall your security app and consider switching to a different brand.
#3. Use Third-Party Apps
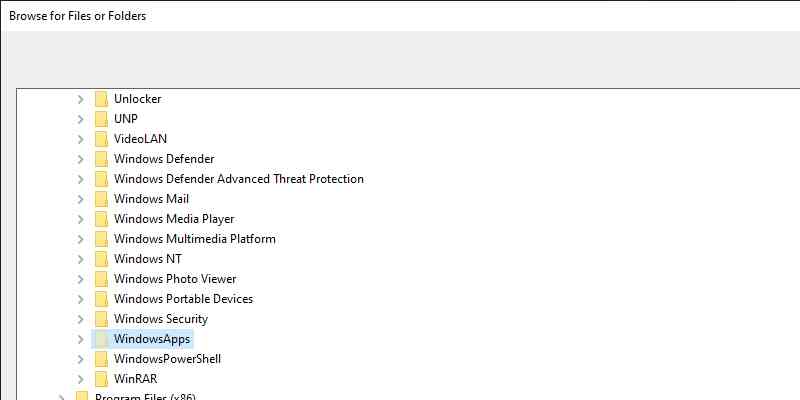
Error 0x80070091 may have something to do with the WindowsApps folder issue. One way to deal with this is to use a third-party app like Unlocker. Here are the steps to do it:
- Download and install the Unlocker application on your computer.
- Open C:\Program Files, then right-click the WindowsApps folder.
- From the menu, select Unlocker.
- You will see a drop-down menu, select Rename.
- Rename the directory to “WindowsApps.old” (without the quotes).
- Save changes by clicking OK.
- You may get a prompt asking you to rename the object on boot. Select Yes.
After following the instructions above, you should be able to perform a System Restore smoothly.
#4. Use Linux Live CD
Apart from Unlocker, another option to fix the error 0x80070091 problem is to use a Linux Live CD. You just need to create bootable media by downloading any version of Linux. Launch your PC from the bootable media and select the “Try Linux without installing” option. After that, go to C:\Program Files and rename the directory for WindowsApps to “WindowsApps.old” (without the quotes).
Restart your computer, then boot into Windows. After taking ownership of the WindowsApps.old directory, you can try to do a System Restore again.
#5. Perform System Update
There are users who report that updating their system has allowed them to get rid of the error. So, there’s nothing wrong if you try the same way. Windows will usually automatically download and install updates.
However, it is possible that certain issues may cause your system to miss an update or two. So, it’s best to manually check if there are any updates that you should install. Therefore, follow the instructions below to do so:
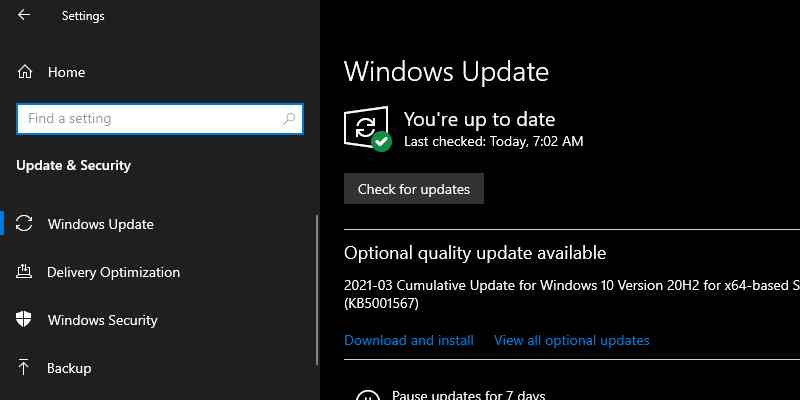
- Open the Settings window by pressing the Windows key + I on your keyboard.
- Go to Updates & Security.
- Go to the right pane and click the Check for Updates button.
Your system will now start checking if an update is available, and will automatically download if there is one. After you restart the computer, the update will be installed.
#6. Perform CHKDSK Scan
Some users reported that file corruption was one of the causes of error 0x80070091. You can fix this problem by doing a chkdsk scan. You can do this by following the instructions below:
- Click the Search icon on the taskbar.
- Type “command prompt” (without the quotes).
- Right-click Command Prompt on the result, then select Run as Administrator.
- Type “ chkdsk /f /r /X: ” (without the quotes). Note: you have to replace ‘ X ‘ with your system drive.
- Run the command by pressing Enter.
- You will also be asked to schedule a disk scan on reboot. Type “ Y ” (without the quotes), then press Enter.
- Reboot your computer.
The scan will take a few minutes, and its duration depends on the size of your system drive. After the process is complete, try to do a System Restore and check if the error is gone.
Read more:
- 8 Ways To Fix Error Code 0x8000FFFF in Windows 10 PC
- 8 Ways to Fix WHEA Uncorrectable Error Windows 10 PC
- 10 Ways to Fix DNS Server Isn’t Responding Error Windows PC
Conclusion:
So those are some ways to solve errors 0x80070091 in Windows 10, 8, and 7. This error is a common problem that you will receive when you want to delete a file or folder or perform other operations on it. We hope that one of the methods above can fix the error 0x80070091 problem on your computer.


![8 Ways to Fix The Hosted Network Couldn’t Be Started in Windows 10 [2026] 8 Ways to Fix The Hosted Network Couldn't Be Started in Windows 10](https://technowizah.com/wp-content/uploads/2021/07/8-Ways-to-Fix-The-Hosted-Network-Couldnt-Be-Started-in-Windows-10.jpg)


