5 Ways to Fix Windows 10 Slow After Update PC – Is your Windows 10 slowing down after an update? Here’s how you can solve the problem of slow Windows after an update.
How to Fix Windows 10 Slow After Update PC Laptop
It is undeniable that Windows updates are indeed useful, in addition to getting new features, updates can also be useful for fixing bugs in the system. But even so, updates can also slow down your computer after installing them.
Read more:
- 5 Ways to Optimize Slow SSD in Windows 10 PC
- 16 Best Free Antivirus for Windows 10 Laptop PC (100% Free)
- How to Uninstall Applications on Windows 10 Laptop PC
- 20 Best Free VPNs for Windows 10 Laptop PCs
If you are also facing the issue of “Windows 10 is slow after update”, the following tips will help you troubleshoot and restore it to its original state. But what causes your computer to slow down after Windows 10 update?
Windows 10 Slow After Update? Here’s the Cause
Windows 10 Update is indeed very useful. This is one way to protect your computer from malicious malware and viruses even before you install good antivirus software.
They protect your computer from malware and viruses that are created every day. The update not only plugs the security flaws but also patches all the bugs that crash the app. Each update aims to make your computer work better.
Then what causes your computer to run slowly after the Windows update?
Actually, there are several main causes that can cause a slow computer after a Windows update:
- buggy updates
- Corrupt system files
- Background apps
How to Fix Windows 10 Slow After Update
Whatever the cause of Windows 10 slowness after the update, if you follow all the methods listed in this guide till the end, you will not face the slow Windows 10 issue again.
#1. Roll Back Windows Update
If a new update has caused your Windows 10 to be slow, then a roll-back update can fix the problem. Microsoft has a built-in method you can use to do this.
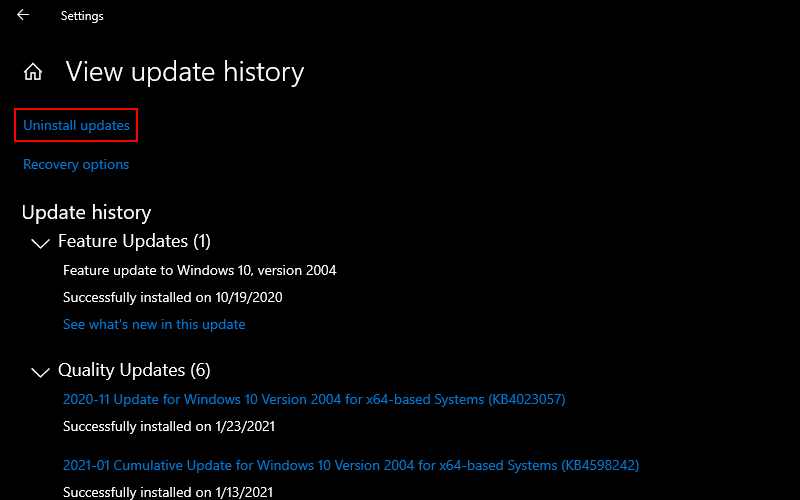
- First, to uninstall the update, go to Settings > Update & Security > Windows Update > View update history.
- Next, click on Uninstall updates. There, you will see a list of all installed updates. You can then uninstall the update that you think is causing the problem.
- This way, you can remove updates that are slowing down your Windows 10.
#2. Repairing Corrupt Files
Sometimes due to a stuck update which could be due to an unstable network connection or similar issues, your important Windows files might become corrupted or corrupted.
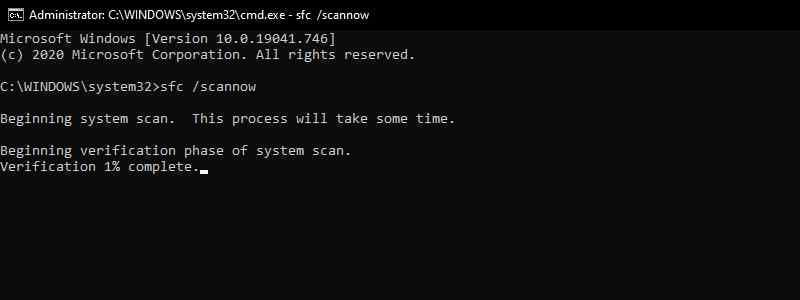
This can make your system act unexpectedly. You can repair the damage using a System File Checker. This is a free tool developed by Microsoft that is useful for corrupt problems like this. It works by scanning and repairing Windows System files.
To run System File Checker, you must use the Command Prompt. Follow the steps below to do this:
- Open the Windows Search bar and type the command prompt.
- Hover over the top result, and on the right side, click Run as administrator.
- Type sfc /scannow and press Enter.
Once the scan is complete, reboot your system. If indeed there is a corrupt problem, it can be solved after following this method.
Run DISM Command Perintah
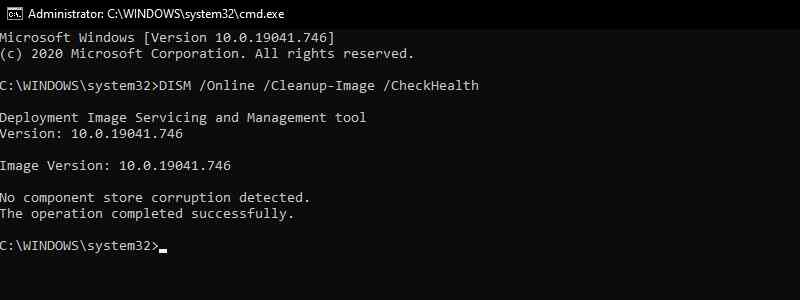
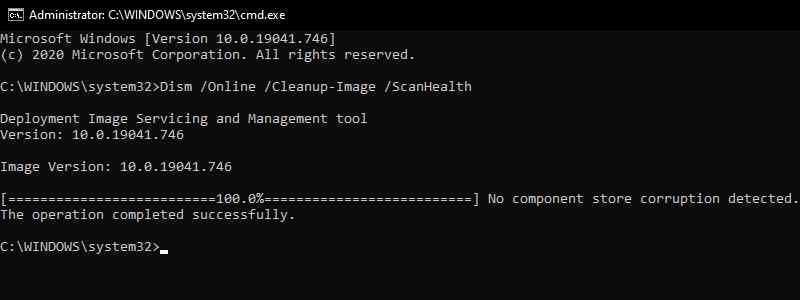
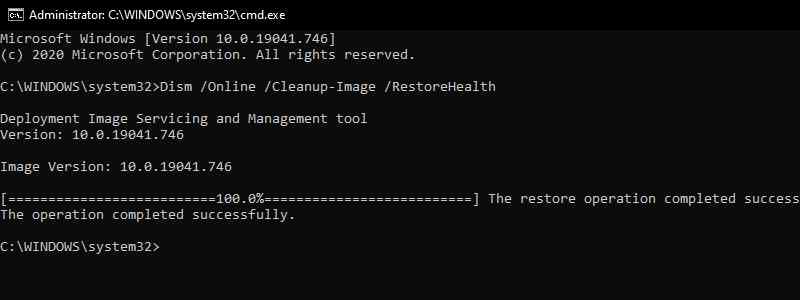
If the SFC command fails to recover your files, use the Deployment Image Servicing and Management (DISM) command. This is another Windows diagnostic tool made by Microsoft, but more powerful than SFC, which works by repairing Windows system image files.
To run this command, open a command prompt with administrator rights, as above.
Run the command DISM /Online /Cleanup-Image /CheckHealth
If there are no crash issues, you can run a further scan using the command Dism /Online /Cleanup-Image /ScanHealth
Note that this process may take a while. If you find the problem is corrupt through the steps above, run the command Dism /Online /Cleanup-Image /restorehealth to download and replace the corrupted files.
Restart your computer after the command is executed. Run the SFC command again to fix the error.
#3. Disable Background Apps
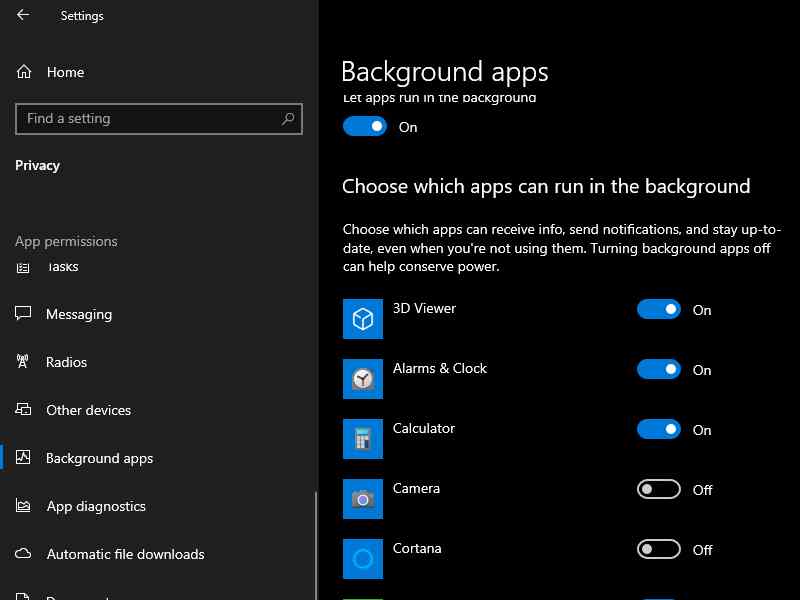
Another method to fix Windows 10 slow after the update is to disable all unnecessary background apps.
As you know, Windows 10 comes with a lot of pre-installed apps. This application can continue to run in the background even when you are not using it. Actually, this app is not really needed to run Windows 10.
As they continue to run, they use up your CPU resources (RAM, cycles, etc.) and this can make your computer slower than usual.
For that, you should stop this unnecessary application. You can follow the steps below to do this:
- Open Windows Settings.
- Then, click Privacy > Background Apps.
- Choose which apps can run in the background of your system and turn off all non-essential apps.
Reboot your computer and this will result in the computer speed returning to normal.
#4. Perform a Clean Boot
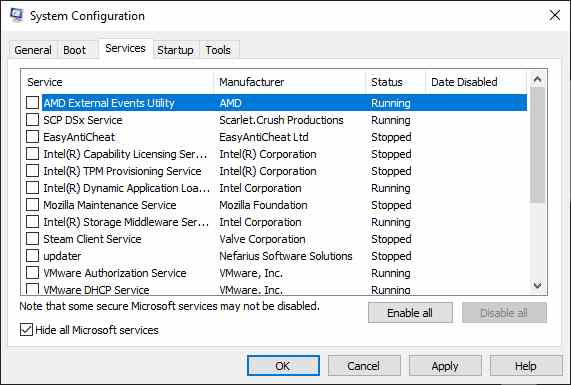
Clean boot is done by starting the computer with minimum drivers and start-up applications, it helps in identifying new applications that are causing problems in your system. Here are the steps to do a clean boot:
- In the Windows search bar, type MSConfig and click System Configuration App.
- On the Services tab, select Hide all Microsoft Services, then click Disable All.
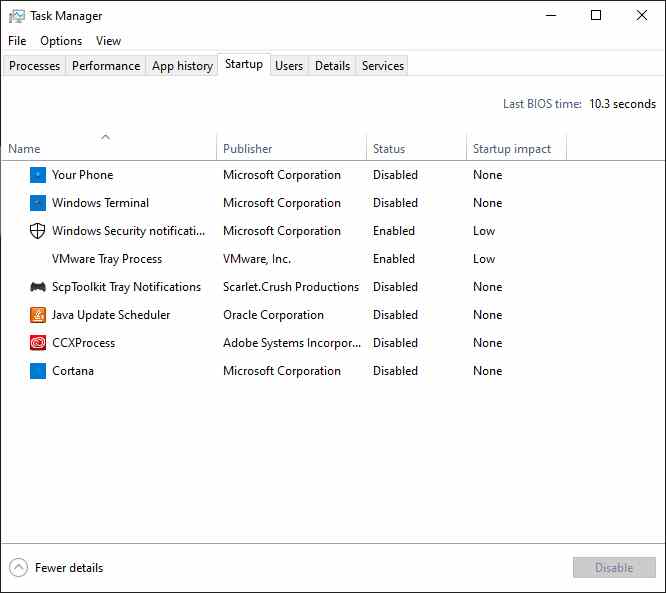
- Under the Startup tab, click Open Task Manager.
- In the Startup section, select and disable all the apps listed here one by one. You can also right-click on the background process and select Disable from the menu.
- Close Task Manager.
- On the Startup tab in System Configuration, click OK.
After doing all the steps above. Just reboot your PC and the clean boot will start.
#5. Run Windows System Restore
Windows allows you to roll back updates. System Restore brings your PC back to the state it was in when the system was functioning perfectly.
System Restore works by saving your Windows software files and registry as snapshots called Restore Points for later use. You can use these restore points to restore your system to a working state. Follow the steps below to get started:
- In the Windows search bar, type “system restore”. Next, click on Create a restore point.
- A System Properties dialog box will appear.
- Select System Protection and click on System Restore. Note: If you can’t click this button, then your system doesn’t have a restore point yet, so you can’t restore it.
- In the next dialog box, click the Next button.
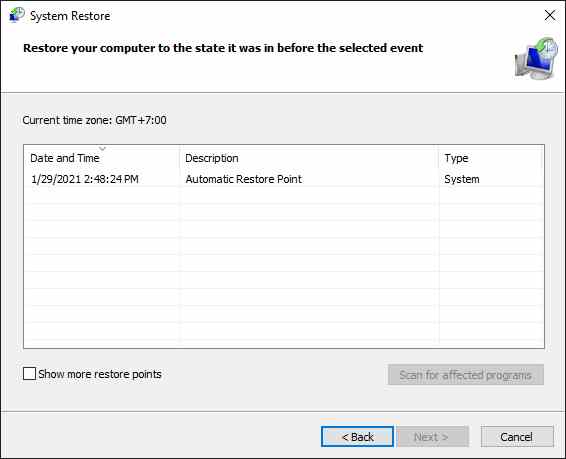
- Select the desired restore point and click Scan for affected programs to confirm which apps will be removed when installed after the restore point date.
- Click Next to start the recovery.
- Finally, click Finish.
Once the restore is complete, your system will be restored to its initial state during the last backup.
Note: The last resort for the slow Windows 10 issues is to use Windows Factory Reset and start over. This is the last option that will bring your computer back to the state it was in when you bought it.
Read more:
- 5 Ways To Remove and Activate Windows 10 Watermark Permanently
- 20 Ways to Fix 100% Disk Usage on Windows 10 PC
- 20 Best Windows 10 Themes Cool And Free Desktop
Conclusion:
This is the explanation of 5 ways to fix Windows 10 slow after the update, You can Deal with a slow computer after a Windows 10 update is a huge annoyance. I hope this one of the methods above can solve your problem.
![8 Ways to Fix The Hosted Network Couldn’t Be Started in Windows 10 [2026] 8 Ways to Fix The Hosted Network Couldn't Be Started in Windows 10](https://technowizah.com/wp-content/uploads/2021/07/8-Ways-to-Fix-The-Hosted-Network-Couldnt-Be-Started-in-Windows-10.jpg)


PRIOCLICK
So this worked now for many of my problems, not just the windows running slow after an update! Literally the best method I found so far, thank you for posting this!