7+ Ways to Root Android with PC Until Success (100% Working) – Several problems can occur when we root via a smartphone. If a problem occurs, the root becomes an error, which in turn causes the root process to fail.

How to Root Android with PC Until Success (100% Working) 2024
If it’s like that, usually for the next root process it will end up the same. Namely, fail, fail, and keep failing.
Read more:
- [100% Work] How to Root Asus Zenfone GO without PC
- How to Use Lucky Patcher Without Rooting Device
- How to Use Lucky Patcher Without Rooting Device
- How to Uninstall Avast to Clean the Roots in Windows 10
Even though rooting on a cellphone is not that difficult, the process is simple, unfortunately for the result sometimes our cellphones find it difficult to show satisfactory things.
But besides that, there are other methods you can use. Namely, rooting through a PC. At least you can root even if you have to use help from another device, right?
This method is not that different from rooting the cellphone. Because even when using a PC, we ask for help from third-party applications/software.
Not much different from when we root on an Android cellphone which also uses additional root applications as assistance.
An example of an application that a cellphone uses to root is Kingroot.
That’s for the one on the cellphone, then what about the root software for the PC?
If on a PC, you will use some root software assistance such as Root Genius, iRoot, OneClickRoot, iSkysoft Toolbox, Kingo Root, and so on.
But unfortunately the root method via PC, it’s more complicated than on a cellphone. But if the results are satisfactory, why don’t we just try to follow them?
And here are some ways to root Android with a PC that you can follow.
How to Root Android with a PC Computer Laptop
Before rooting Android with a PC, we first prepare a few things that are mandatory for this cellphone root tutorial.
Things that must be prepared
1. Your smartphone battery is charged. At least 50%, if it is charged under that power, please charge it for a while until it meets the requirements.
2. Enable USB Debugging mode.
For how to activate this mode, follow the steps below:
- Open Settings on your smartphone, then look for the About Phone menu then click on the menu.
- On the About Phone menu, scroll your screen down to find a menu called ‘ Build Phone ‘.
- Click ‘ Build Phone ‘ several times or about 5 times. Anyway, click until you see a warning that reads ‘ You are Now Developer ‘.
- Then back in Settings, look for the menu named ‘ Developer Options ‘ or Developer Options.
- Click on it and look for USB Debugging in the menu. If you have found it, all you have to do is click the checkbox to enable USB Debugging.
- The activation process has been completed.
3. Enable the install feature of applications from unknown sources, the method is very easy:
- Open the Settings menu
- Then click Security or Security Settings
- Inside the menu, find ‘ Unknown Source ‘ or Source Unknown
- Activate that menu. That way, the feature to install applications from unknown sources is active
4. Prepare the USB cable that came with HP. If there is none, use whatever USB is as important as it is compatible
5. Have internet access on a PC
After you have the things above, it is time to enter the steps to root Android via PC.
Steps to Root Android Through a PC Computer Laptop
#1. Using Root Genius

- First of all, first, turn off the antivirus that is on your PC. Because your PC antivirus may detect something dangerous in your Root Genius software or consider the software to be a virus
- Download the Genius Root software at Shaume.com
- Install and run
- Plugin the data / USB cable into the PC to connect your Android phone. After that, a notification will appear as shown in the picture
- Then click check the I Accept User Agreement option, then click ‘Root It’ to start the root process
- The root process will run, you just wait until the process ends
- When finished, unplug your data cable from the PC then check your Android phone. There will appear a new application called ‘Kinguser’
- Until here you have successfully rooted Android via your PC
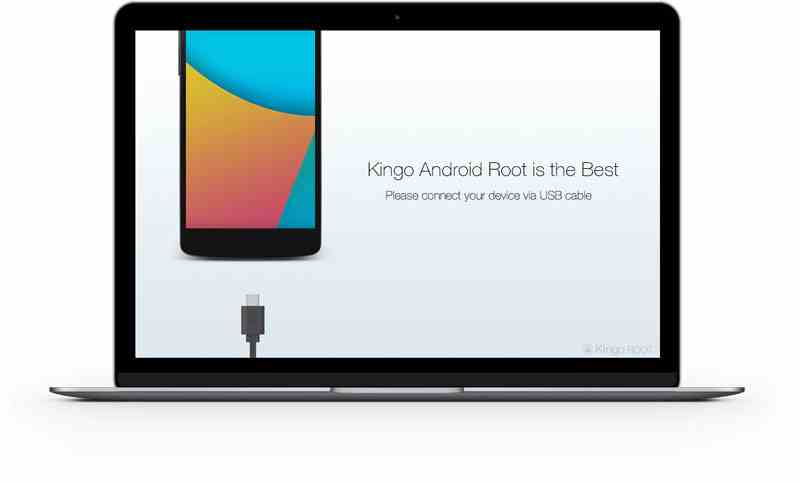
#2. Using Kingo Root

- Download this software on their official site
- After you download, install, and then open the application as usual
- Then connect your phone to the PC using a data cable
- Kingo Root will search for devices connected to the computer. If your phone has been detected by Kingo Root, a notification will appear as shown
- Click Root to start the root process
- Wait for the process to end
- When finished, unplug your data cable then check on your Android application menu. If successful, an application called Kingo Superuser will appear
#3. Using iRoot

- Download the software on their official site. On the ‘Product’ page, there is a choice of iRoot devices for Android and PC. Since you are using a PC, then click download for PC devices
- Once downloaded, install the application as usual
- Then connect your Android phone to your PC using a data cable. After that, click the green command that says ‘Connect’
- iRoot is looking for your device, just wait. And after your device is found, the name of your Android smartphone will appear on the laptop screen.
- Click Root to start the root process on your Android
- Wait for the process to complete. When it’s finished, unplug the data cable to disconnect then check your cellphone because a new application will appear as a result of your root
- And congrats, your phone has been rooted successfully
#4. Using OneClickRoot

- First of all, download the OneClickRpot application for PC devices on their official site
- Open the software, then the display will appear as shown
- Connect your phone to your PC with your data cable. Then click the command ‘Root Now
- Unlike other software that recommends that the battery be charged with at least 50% power, for this OneClickRoot software, you must have a 25% remaining battery.
- After you click the ‘Root Now’ command, the software will work in just one click, as the name suggests.
- Wait until the process is complete, if so, unplug your data cable and the latest Superuser application from OneClickRoot will automatically appear
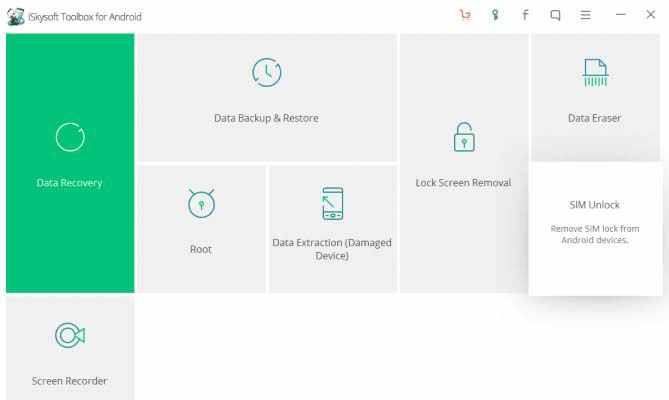
#5. Using iSkysoft Toolbox

- Download this software by searching on Google. Just type the keyword download iSkysoft Toolbox for PC
- Install and open the application as usual
- In the initial screen, several menu options will appear. You just click the ‘Root’ menu because here you will root the cellphone
- Connect your smartphone to a PC using a data cable
- Wait until iSkysoft Toolbox captures the devices connected to them
- Let the detecting process run until 100%. After that, the ‘Root Now’ menu will appear, you click on the menu and the root process takes place
- Wait for the root process to finish, if so, do the steps described above
Read more:
- How To Root Android With KingRoot
- How to Root Andromax G2 AD681H on Android
- Root Asus Mobile with PC Without PC of All Types
Conclusion:
Apart from the five software, there are other root software such as Kingroot, Baidu Root, Wondershare MobileGo, and others. You just have to choose one of these software.


![How To Fix Corel Draw Cannot Save on X5, X7, X8 [2025] How To Fix Corel Draw Cannot Save on X5, X7, X8](https://technowizah.com/wp-content/uploads/2021/11/How-To-Fix-Corel-Draw-Cannot-Save-on-X5-X7-X8-218x150.jpg)


![10+ Ways To Take Screenshot on Asus Laptop Windows 10 [2024] How To Take Screenshot on Laptop and PC Windows](https://technowizah.com/wp-content/uploads/2020/06/How-To-Take-Screenshot-on-Laptop-and-PC-Windows-100x70.jpg)
