3 Ways To Disable Windows Defender in Windows 10 PC – If you plan to install a third-party antivirus, such as Norton, AVG, or Kaspersky, you may have to disable Windows Defender first.
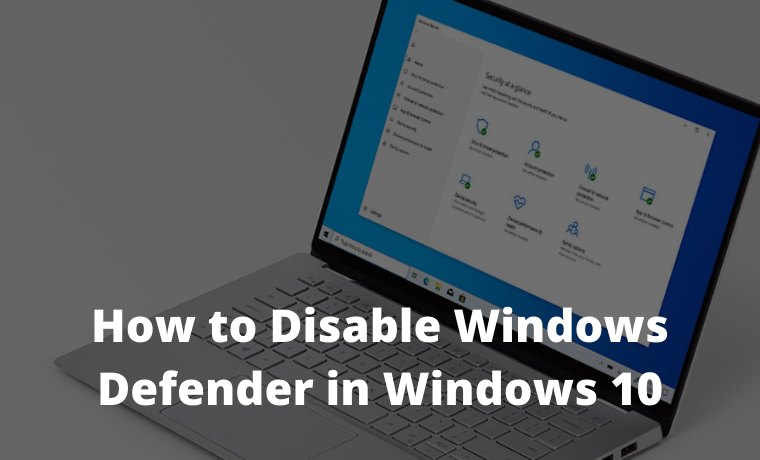
How to Disable Windows Defender in Windows 10 Laptop PC 2024
Otherwise, Windows 10 may not be able to install updates, or your virus program may not function properly. Or maybe Windows Defender is preventing you from doing a certain task.
What is Windows Defender?
Windows Defender is a preinstalled software that comes with every laptop or computer running Windows 10. It is an anti-malware program that can protect you from viruses, ransomware, and spyware. However, this program is known to cause problems for users, especially if they have another antivirus installed.
Read more:
- 3 Ways to Copy Paste in Windows 10: Quick Way
- 16 Best Free Applications for Windows 10 You Must Install
- How to Change Windows 10 Administrator Name
- How to Reinstall Applications on Microsoft Store
How to Disable Windows Defender in Windows 10
#1. How to temporarily disable Windows Defender
This method allows you to temporarily disable Windows Defender. If the system is at risk, the program will restart itself so that it can do its job.
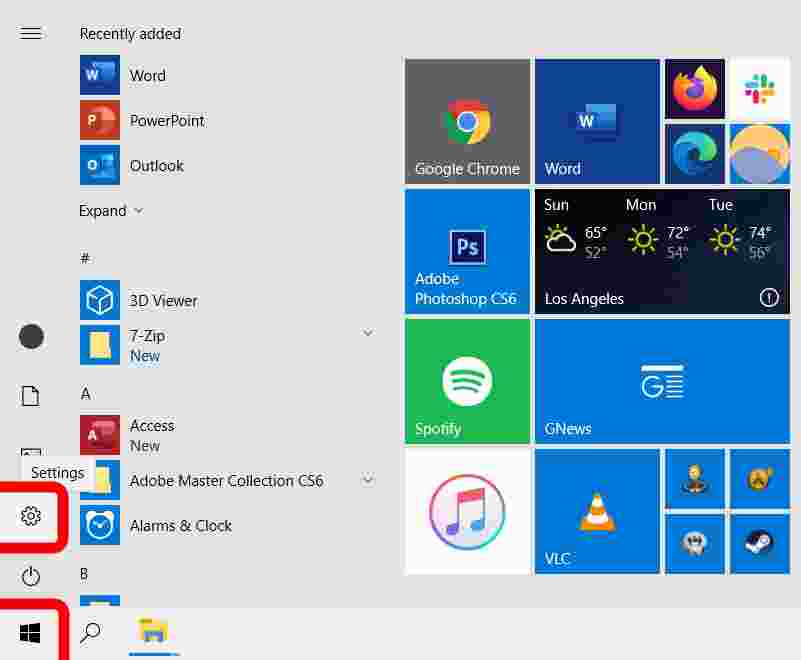
- Open the Windows Start Menu. This is the Windows logo in the lower-left corner of your screen.
- Open the settings menu. This is the gear icon just above the power button.
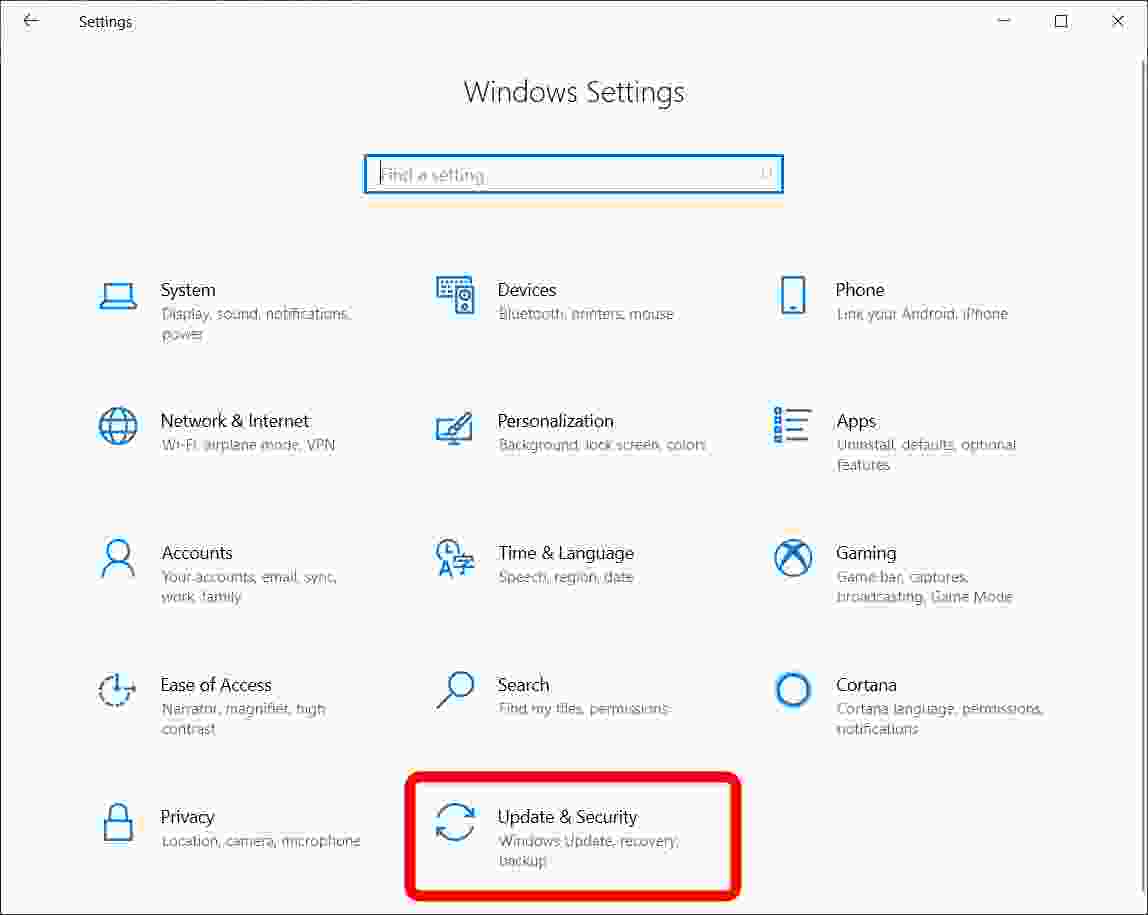
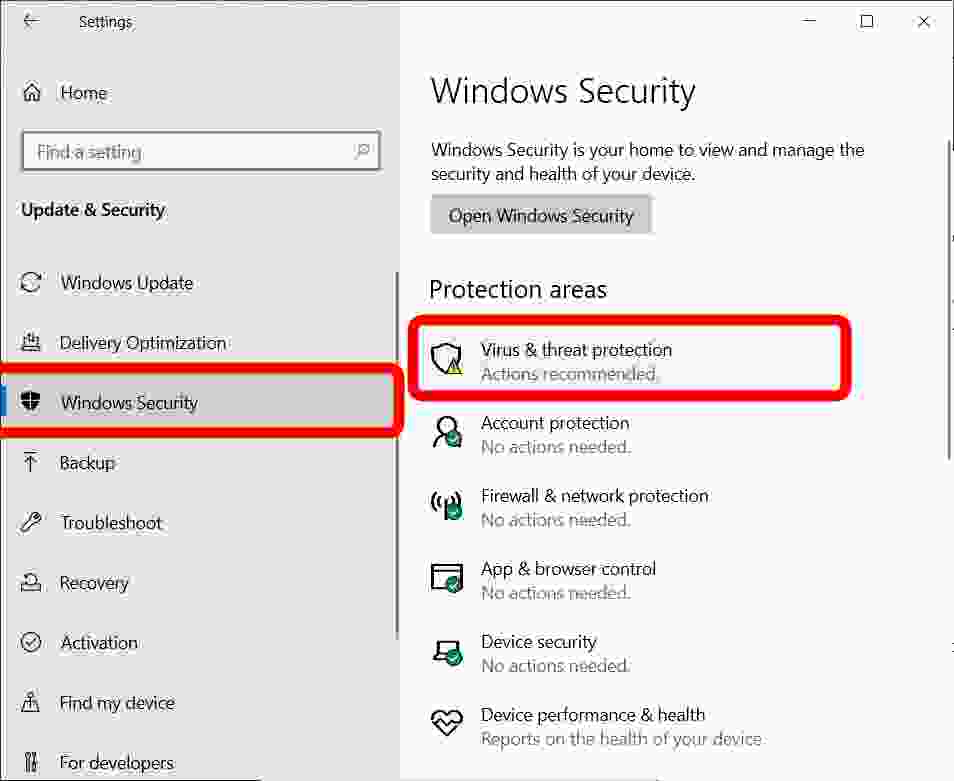
- Click Update & Security.
- In the sidebar, click “Windows Security”.
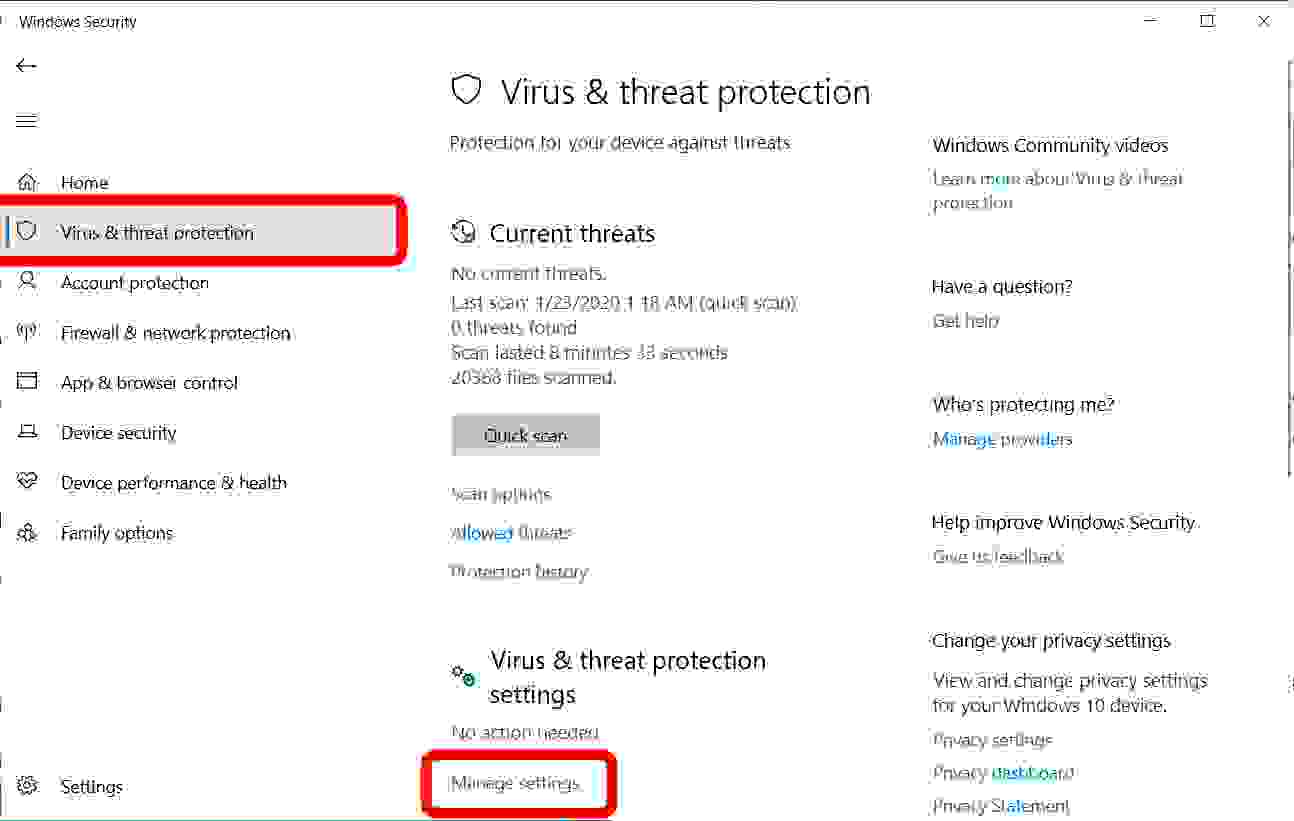
- Click “Virus & threat protection” from the right window.
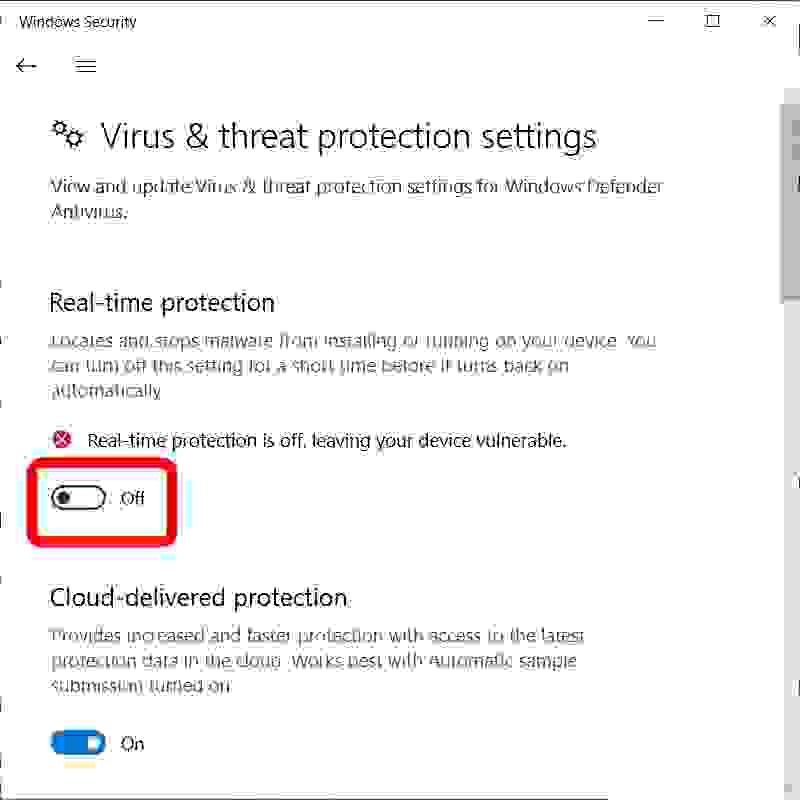
- In the new window, click “Manage settings”. You will see this under “Virus & threat protection”.
- Disable the toggle under “Real-time protection”.
#2. How to Permanently Disable Windows Defender
A more permanent solution involves editing the computer registry. Follow the steps below:
Warning: Be careful when editing the registry. Make sure to back up your data if your system has irreparable damage.
- Click the Windows key + R.This will open the Run Command Box.
- Type “Regedit” in the search bar and click OK.
- Click “OK” when a pop-up window asks if you want to allow the application to make changes to the device.
- In the top window search bar, paste the following:
HKEY_LOCAL_MACHINE \ SOFTWARE \ Policies \ Microsoft \ Windows Defender - Press enter on the keyboard.
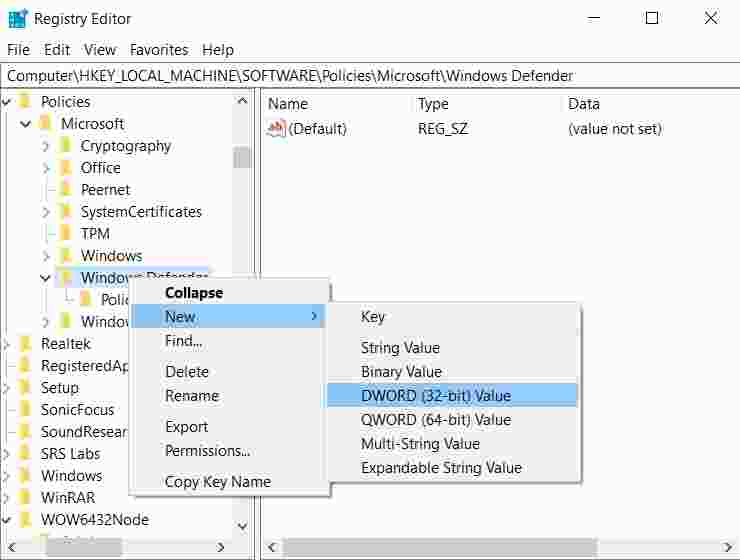
- Right-click on the Windows Defender folder in the sidebar.
- Select “New” from the drop-down menu.
- Select “DWORD (32-bit) Value” from the given options. A file will appear in the right window.
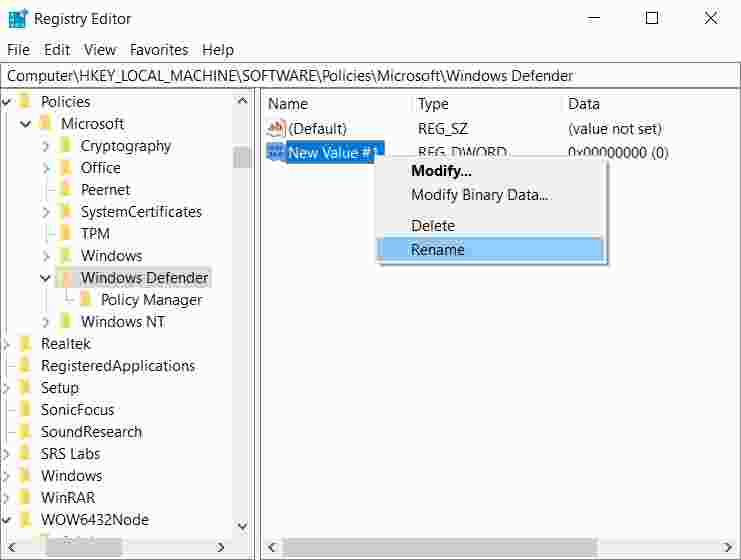
- Right-click the file “New Value # 1” and select “Rename”.
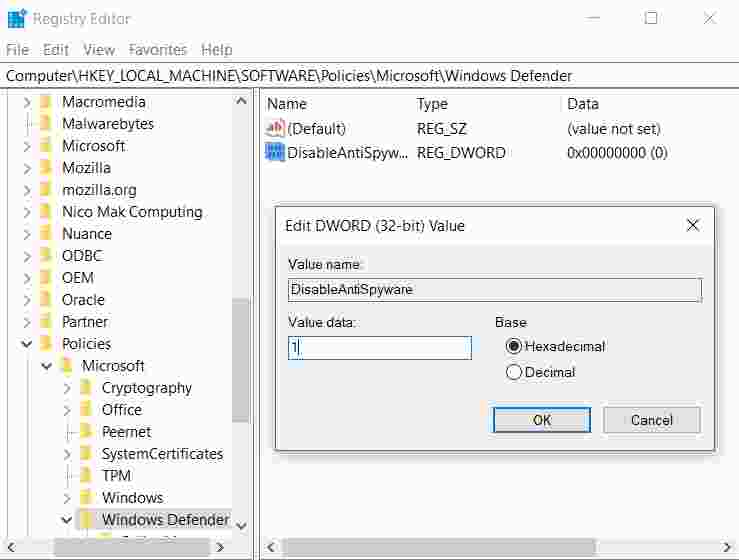
- Change the name to “DisableAntiSpyware”.
- Double-click the DisableAntiSpyware DWORD file.
- Change the value data in the pop-up window from 0 to 1.
- Click OK.
- Restart your computer. The changes will not be successful until you restart the computer.
Read more:
- 3 Ways to Copy Paste in Windows 10 PC Laptop
- 7 Ways to Enable Dark Mode in Windows 10 PC
- 6 Ways to Fix Slow Boot Time in Windows 10 PC
Conclusion:
If you want to enable Windows Defender in the future, you can repeat the previous step but set the DisableAntiSpyware value data to 0.
If you don’t see this file, you can create a new one and set the new file’s value data to 0. After you turn off Windows Defender, make sure to install new anti-malware software immediately.

![8 Ways to Fix The Hosted Network Couldn’t Be Started in Windows 10 [2026] 8 Ways to Fix The Hosted Network Couldn't Be Started in Windows 10](https://technowizah.com/wp-content/uploads/2021/07/8-Ways-to-Fix-The-Hosted-Network-Couldnt-Be-Started-in-Windows-10.jpg)


