10+ Ways To Take Screenshot on Asus Laptop Windows 10 And PC (Asus, HP, Dell, Lenovo, etc) – Are you facing any issues while taking a screenshot on the Asus laptop? Then you are in the right place. In this post, you will learn how To Take Screenshots on laptops, PC, and Windows 10, (Asus, HP, Dell, and Lenovo.

- 1 How To Take Screenshot on Asus Laptop Windows 10 [2024]
- 2 How To Take Screenshots on Asus Laptop Windows 10, HP, Dell, Lenovo, etc.)
- 2.1 #1. Screenshot with Windows Button + Print Screen
- 2.2 #2. Screenshot with the Print Screen Button
- 2.3 #3. Screenshot with the Alt + Print Screen Button
- 2.4 #4. Screenshot with Windows Key + Shift + S
- 2.4.1 a. Show the page you want to screenshot
- 2.4.2 b. Press the Windows key + Shift + S
- 2.4.3 c. Select the display area that you want to screenshot
- 2.4.4 d. The screen was successfully recorded by Snip & Sketch
- 2.4.5 e. Display the screenshot in the Snip & Sketch application
- 2.4.6 f. Save image results
- 2.5 #5. Screenshot Using the Snipping Tool
- 2.6 #6. Screenshot with Lightshot Application
- 2.7 #7. Screenshot with the PicPick Application
- 3 Conclusion:
How To Take Screenshot on Asus Laptop Windows 10 [2024]
in various methods like with the help of external software or by default screenshot methods available on various Operating Systems. So read the article fully and learn How To Take Screenshots on Asus Laptop.
Read more:
- 7 Easy Ways to Take Screenshots on a Laptop or Macbook PC
- How to Take Screenshots on Windows 10 Laptop PCs
- 16 Best Free Applications for Windows 10 You Must Install
- What is BIOS In Computer And How Does It Work
As a means of sharing information with others without the need to copy that information. Just take a screenshot and share it. To capture the screen display and edit it. To clarify the purpose of an icon in making tutorials the steps to use a program.
The screenshot will be very useful if you want to explain something but it is difficult to understand if you only use text, by using a Screenshot image display or SS reader it will be easier to understand the information you want to convey.
How To Take Screenshots on Asus Laptop Windows 10, HP, Dell, Lenovo, etc.)
#1. Screenshot with Windows Button + Print Screen
With the Windows + Print Screen key combination you can capture the screen display and automatically save it directly to the Pictures folder on your laptop. Next step-by-step screenshot with Windows + Print Screen button :
a. Show the Page you Want to Senses
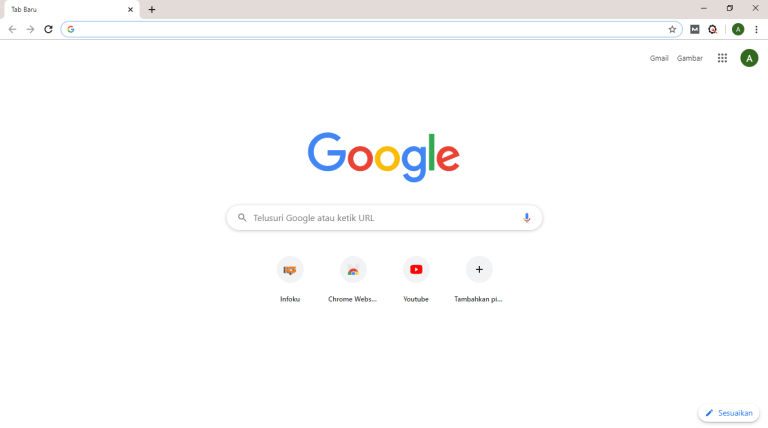
The picture above is an example of when you want to retrieve the SS google page. You can use other objects as needed.
b. Press the Windows key + Print Screen

If you notice when you press the combination button the screen will flash, it is a sign that the screen has been screenshot.
The location of the PrtScn key is sometimes different between keyboard 1 and the others, but generally, it is in the upper right corner.
c. Images Saved in the Pictures Folder -> Screenshot
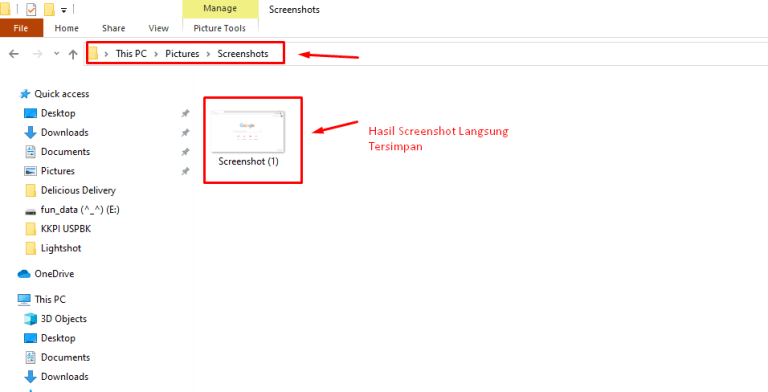
In this way, the screenshot is automatically saved. To see it, you just need to open the Pictures folder on your laptop and then open the Screenshots folder or in the C: \ Users \ User \ Username \ Pictures \ Screenshots directory.
#2. Screenshot with the Print Screen Button
In this first way, we will do a screenshot using the print screen button ( PrtSc SysRq ) on the keyboard. Using this button will capture a whole display on the screen.
Here are the steps for how to take screenshots.
a. Select the display you want to screenshot
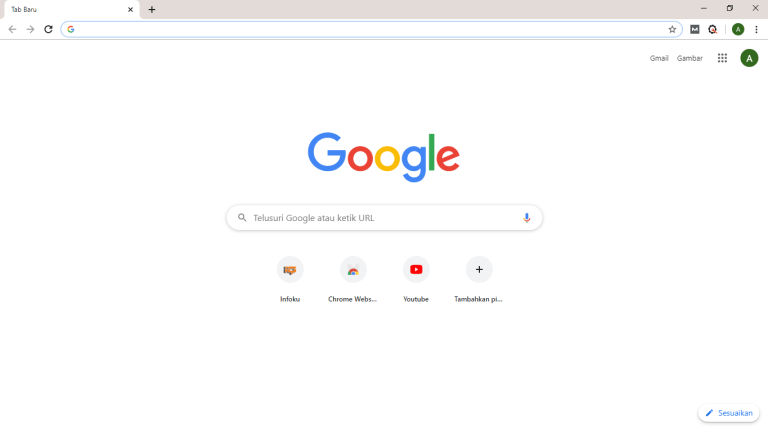
In the above display, we choose the Google start page that we will screenshot for the experiment. The picture above is only a sample, you can use other drawing objects as needed.

The PrtScn or PrtSc SysRq button is usually located on the upper right side of the keyboard, and if we press the button the screen will automatically make a screenshot of the active window, and then we save it as an image.
c. Open the Paint Application> then paste (CTRL + V)
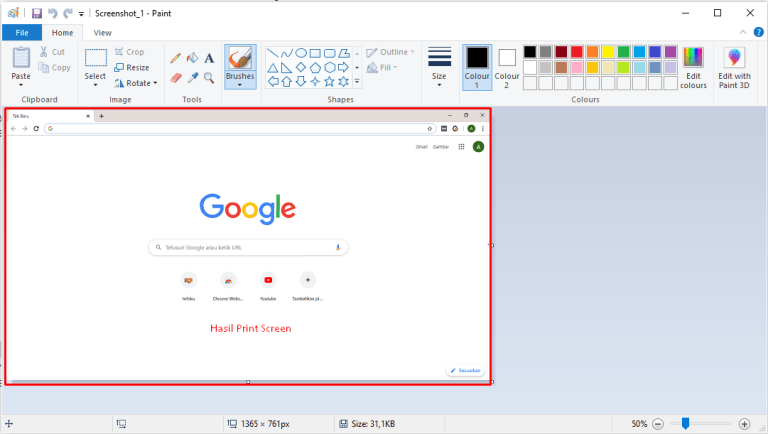
After pressing the PrtScn or PrtSc SysRq button, then we open the paint application in our windows, and we paste the results by pressing the CTRL + V button. With so automatically the results window that we have screenshots will appear in the application.
d. Saving the screenshot image
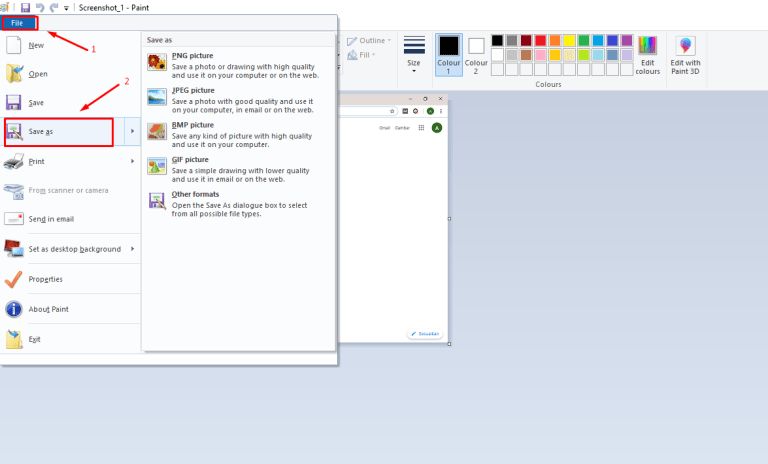
Finally, we can save the image by clicking File in the top left corner, and then selecting Save As. There, we will face the choice of what format to save it and put it in which folder. So choose according to your individual needs
#3. Screenshot with the Alt + Print Screen Button
The second way is to combine the Alt and Print Screen keys. With this key combination, you can make screenshots only on the current page.
Examples and step by step are as follows:
a. Show the page to be a screenshot
You can choose the display you want to screenshot, for example in the display above we will do a screenshot of the video window that we play and ignore the background display behind Google Chrome.

We can also do screenshots by pressing Alt + PrtScn on the keyboard that we have. The location of the PrtScn keys can vary on each keyboard but is generally located on the right side of the keyboard.
c. Open the Paint Application> CTRL + V
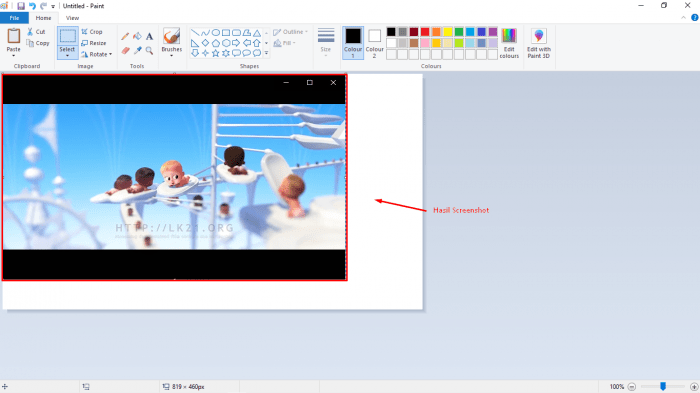
To put the screenshot, you can open the default Windows application that is Paint, then press CTRL + V on the keyboard so that images can appear in the application window. The results will be as above, only the movie display will appear while the Google Chrome display behind will not be caught on screen.
d. Save the image (CTRL + S)
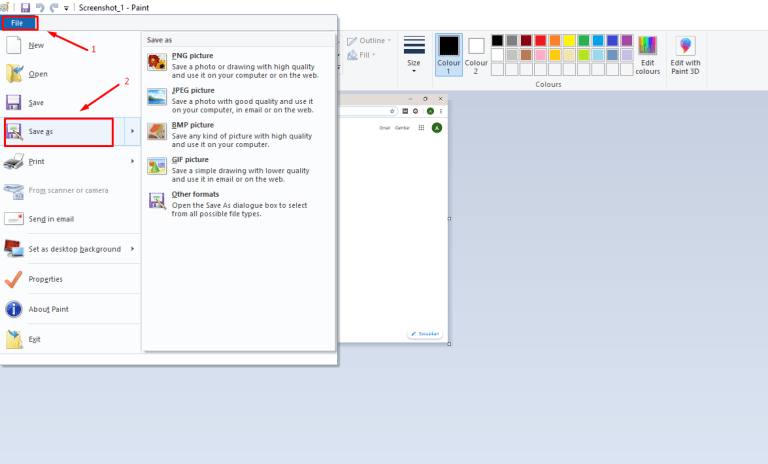
If the screenshot is what you want, then save the image by clicking File> Save As or pressing the Ctrl + S keys. Then the picture is automatically saved on your laptop.
#4. Screenshot with Windows Key + Shift + S
The fourth method uses the default application from Windows, Snip & Sketch. Using this application is not difficult. just press the Windows key + Shift + S to activate it.
If you are still confused about its use, please follow the steps below:
a. Show the page you want to screenshot
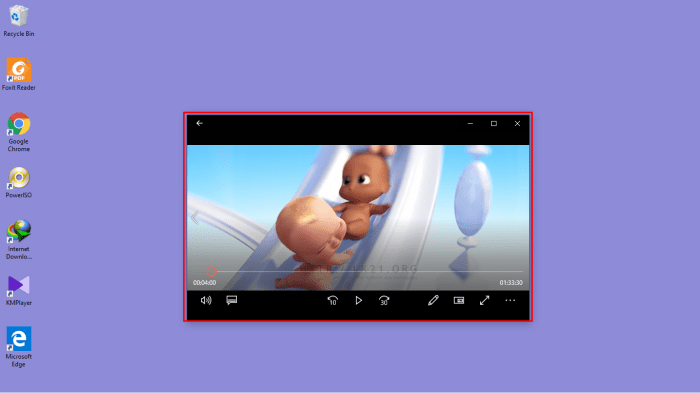
Select the view you want to screenshot, for example, we will screenshot the image in the video view that we are playing.
b. Press the Windows key + Shift + S

This time we will do a screenshot using Snip & Sketch which is the default from Windows. As for opening the feature, you can press the Windows key + Shift + S on the keyboard to make it faster.
c. Select the display area that you want to screenshot
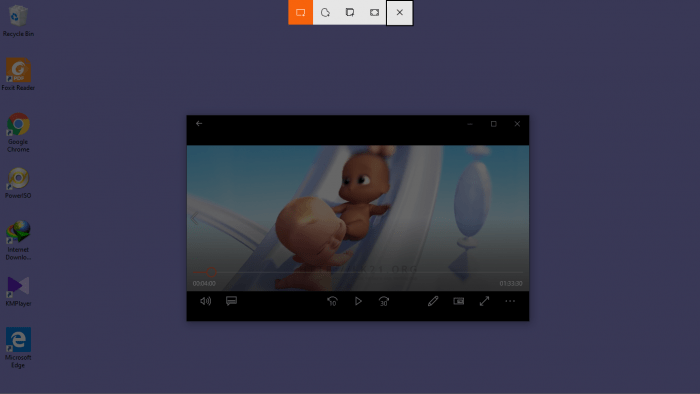
If you have pressed the Windows key + Shift + S, the screen will turn a little dark and our cursor will change to an ” + ” icon. Here we can choose which areas to take Screenshots of. The trick is to simply click and move the cursor to the view that we want the screenshot.
d. The screen was successfully recorded by Snip & Sketch
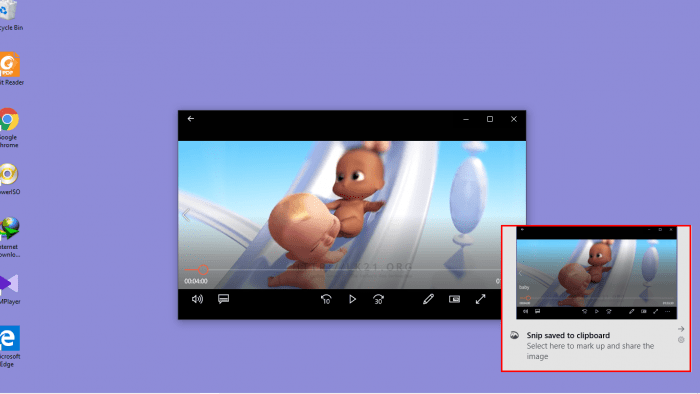
When it has been successfully recorded by the Snip & Sketch feature, the image will appear in the small window in the lower right corner as a form of notification. You can click on the notification and then it will be directed to the Snip & Sketch application.
e. Display the screenshot in the Snip & Sketch application
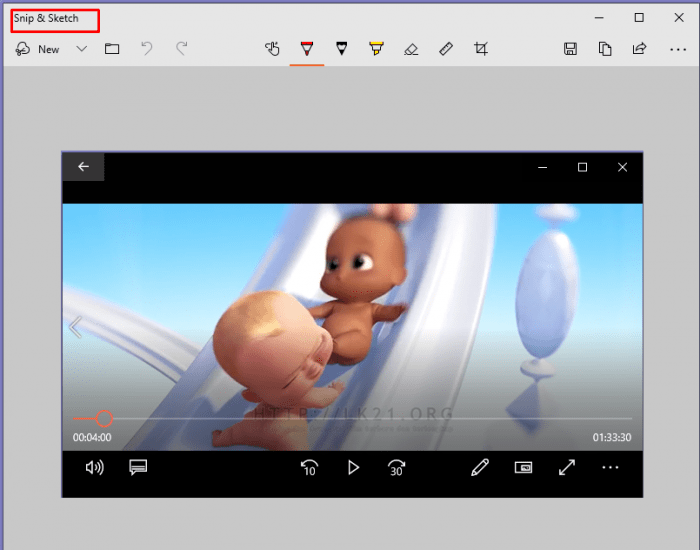
We can also make additional edits such as adding text, highlighter, arrows or writing with features in it. If it feels right then we can proceed to the storage stage.
f. Save image results
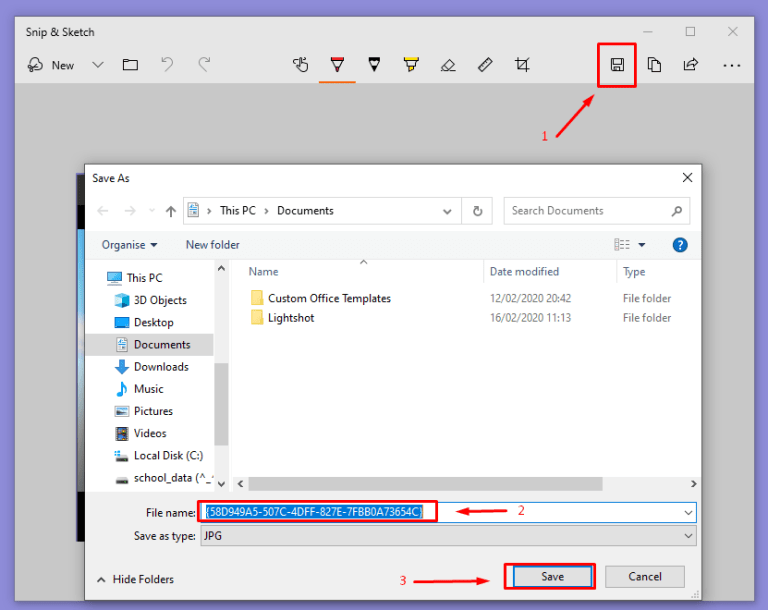
Lastly to save the results of the image we can click the Save icon at the top of the application according to the arrow listed. Just provide the name and location where the image will be stored on your laptop.
#5. Screenshot Using the Snipping Tool
The snipping tool also includes a default application from Windows. Its features are almost the same as Snip & Sketch. Because Snip & Sketch is the result of the development of the Snipping Tool. The snipping tool already exists from the Windows 7 version until now Windows 10.
How to use it can follow the following steps:
a. Open the Snipping Tool application
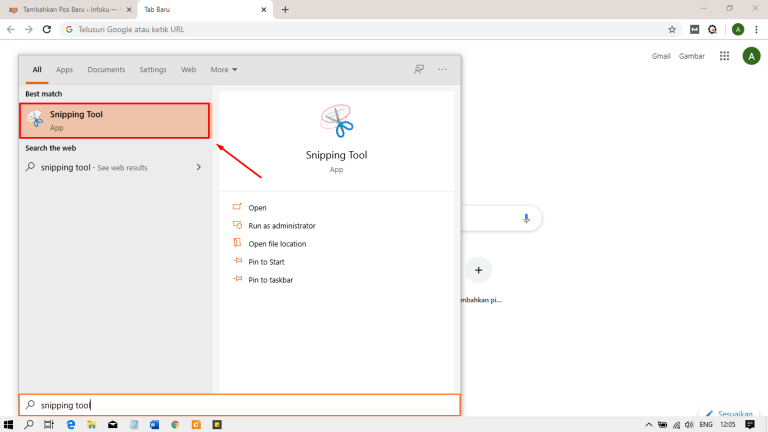
As usual, open the page that will be a screenshot on your laptop. Then open the Snipping Tool application, so you can easily through the Windows search. Type the Snipping Tool then click to run it.
b. In the Snipping Tool view, select New
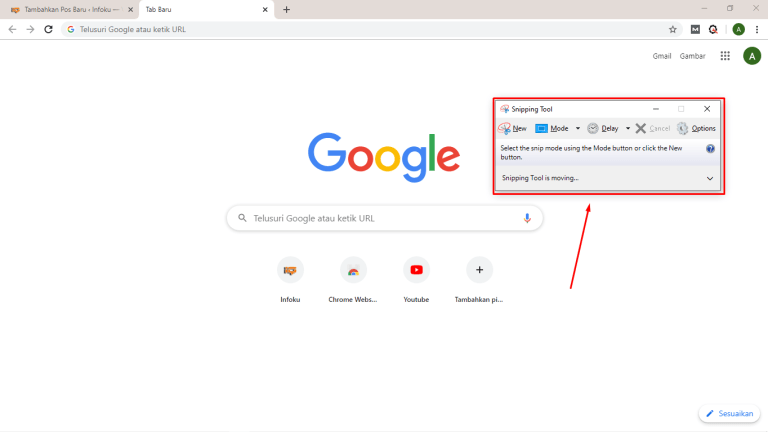
Langkash then you can select New from the menu in the Snipping Tool application to start screenshots of your laptop screen.
c. Determine the area to be screenshot
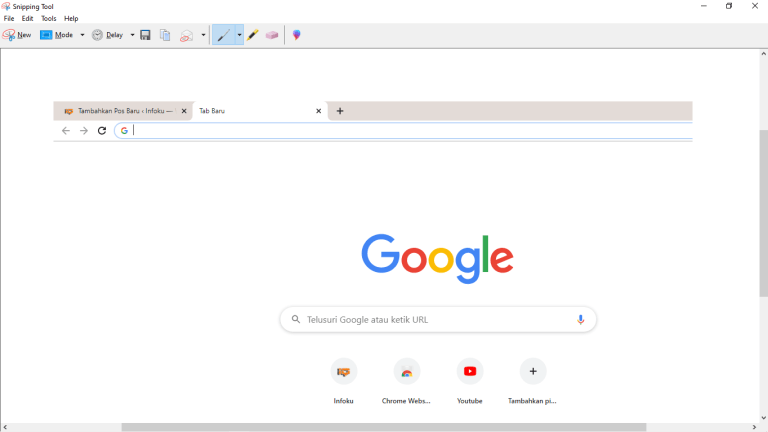
Select the area that you want to screenshot. Next, you will be directed to the Screenshot Preview window of the snipping tool application. At this stage, you can edit the screenshot before saving it.
d. Image storage process
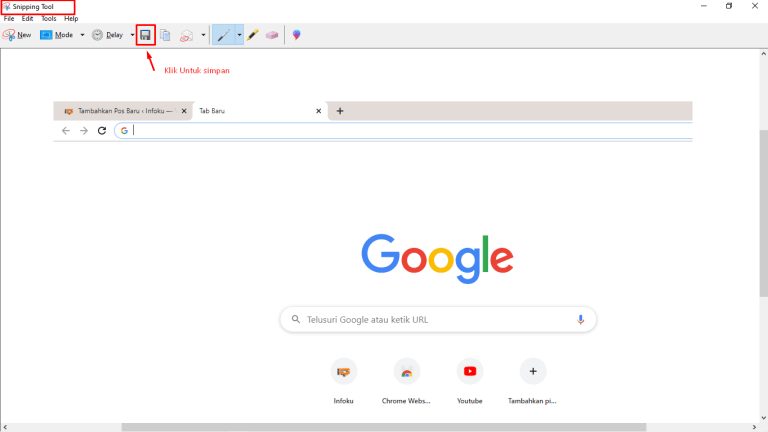
To save your image, just click the Save icon, name the screenshot file, and click Save. Then the images will be automatically saved on your laptop!
#6. Screenshot with Lightshot Application
It is an application taker screenshot of the screen when the user simply presses the print screen or PrtSc SysRq key on your keyboard. With the light shot, you can edit to add lines and so forth. It can also directly save and upload to the cloud.
Features in LightsHot:
- Fast Screenshot according to the selected area. You only need two steps to do screenshots in any area as you wish.
- Share easily by using a light shot server. You can upload the screenshot to the free light shot server and get the URL to share with others you want.
- I can easily edit the screenshot.
- Search for similar images, with this feature you can search for images that are similar to the image you selected on the internet and if you find a light shot it will display it.
How to use the light shot application is as follows:
a. Download and install the Lightshoot application
b. Show the Page you Want to Senses
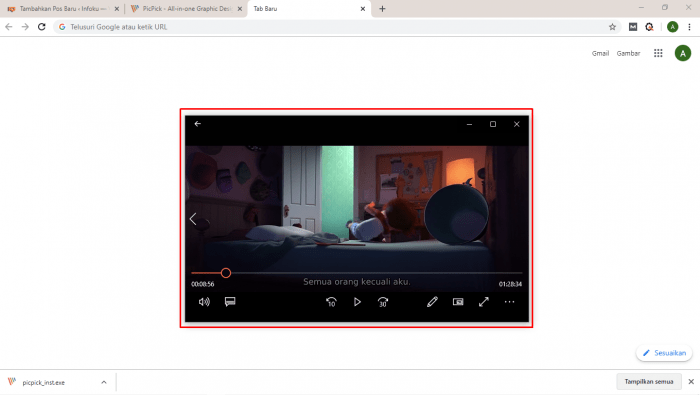
In this example, we will take a screenshot of the video display that we are playing. The Google Chrome background image behind it will be ignored.

To use the Lightshot feature, you only need to press the print screen button or PrtSc SysRq on the keyboard, then the screen display will automatically become dim.
d. Determine the area you want to screenshot
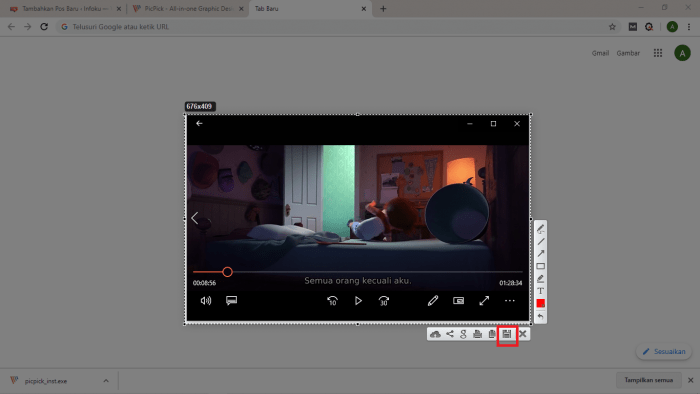
Here you can freely determine which part of the image you want to screenshot by clicking and dragging the cursor and then releasing. In addition, there are also editing features such as adding text to images, lines, or other marks easily.
e. The process of saving an image
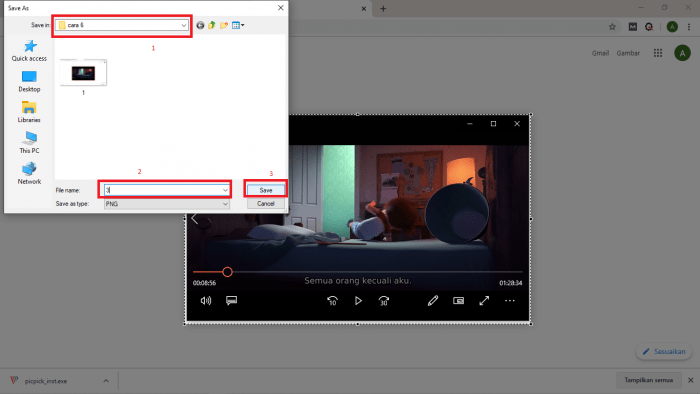
If it is suitable you can save it by clicking the Save icon and then save it in the directory you want.
#7. Screenshot with the PicPick Application
PicPick is a complete Screenshot application with various features that make it easy for users to edit screenshots. This application combines the capabilities of screenshots with image editing applications such as Paints.
Features in the PicPick application:
- It can add various elements to clarify the picture.
- Virtual pixel ruler to measure the size of elements on the screen.
- A magnifying glass for zooming images in a cooled area.
- Color pickers can take color from the elements on the screen.
- CrossHair is used to get the coordinates and angles of objects on the screen.
Before going to how to screenshot on a laptop with this PicPick application there are several hotkey options for screenshots, namely:
- For full-screen press the Print Screen button.
- For the active window Screen, press Alt + Print Screen.
- For the Screen window selected press Ctrl + Print Screen.
- To take a specific part press Shift + Print Screen.
- To take part that has been fixed, the size is Shift + Ctrl + Print Screen.
Here’s how to use the PicPick application for screenshots:
a. Download and install applications PicPick
b. Open the page you want to screenshot
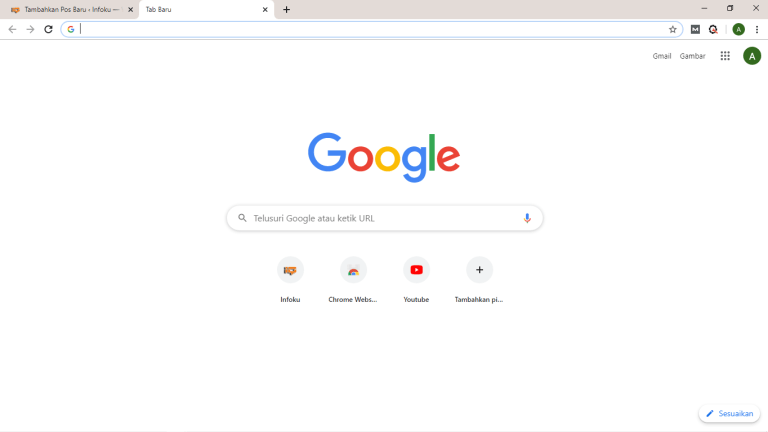
Display the page that will be a screenshot to save as an image in the format you want. The picture above is just an example, you can use the following image as needed.

There are several hotkey options for screenshots in this application, this time the screenshot is used on the active window screen, press the Alt + Print Screen button on the keyboard.
d. Make edits to the image
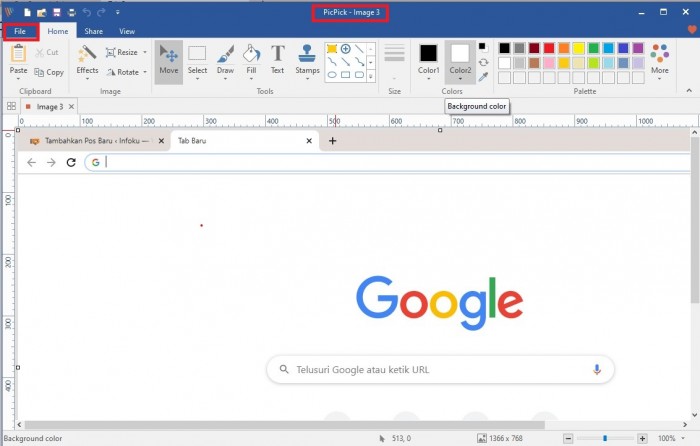
After pressing Alt + Print Screen it will be directed to the PicPick edit page. Here you can edit as you wish easily because it looks almost the same as the Paints application.
e. Save image
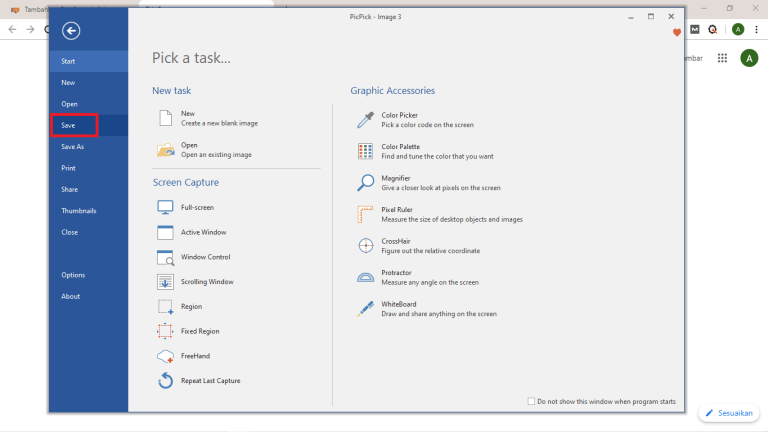
Save the image by clicking File and then select Save. The picture will be automatically saved in the folder you specified. Screenshot on Asus Laptop
Read more:
- 5 Ways to Increase Your Windows Laptop Battery Life
- Here’s How to Use Emojis on a Windows PC Laptop
- 7 Ways To Find IP Address on Windows 10 Laptop PC
Conclusion:
So, friends, That’s the above Screenshot on the Asus Laptop of various ways on the laptop screenshots complete with pictures of each step that hopefully can make it easier for you to understand.
![8 Ways to Fix The Hosted Network Couldn’t Be Started in Windows 10 [2026] 8 Ways to Fix The Hosted Network Couldn't Be Started in Windows 10](https://technowizah.com/wp-content/uploads/2021/07/8-Ways-to-Fix-The-Hosted-Network-Couldnt-Be-Started-in-Windows-10.jpg)


[…] need to know if you looking how to screenshots on Asus laptop or personal computer (PC) with Windows operating system, you can’t only […]
Fine comprehensive article. I am benefited. Thank the blogger.