How to Change Windows 10 Administrator Name – If the administrator accounts you want to change are linked to a Microsoft account, you can change the admin name by going to settings> Accounts> Your Info and clicking on the Manage my Microsoft Account option. This will open up the Microsoft website, where you can edit your profile. Make sure to restart your device when done.
How to Change Windows 10 Administrator Name on Laptop PC 2024
After you restart, you will see the new username on the login screen.
Read more:
- 7 Ways To Fix Sound Problems in Windows 10 PC
- What Does Run as Administrator Mean in Windows 10
- How to Install Apps from Microsoft Store on Windows
- How to Reinstall Applications on Microsoft Store
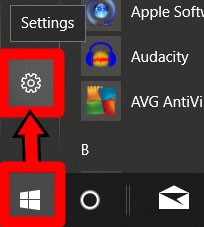
1. Open the Windows Start menu. You can do this by clicking the button in the lower-left corner of the screen, which resembles the Windows logo.
2. Then select Settings. It’s the gear icon directly above the power button.
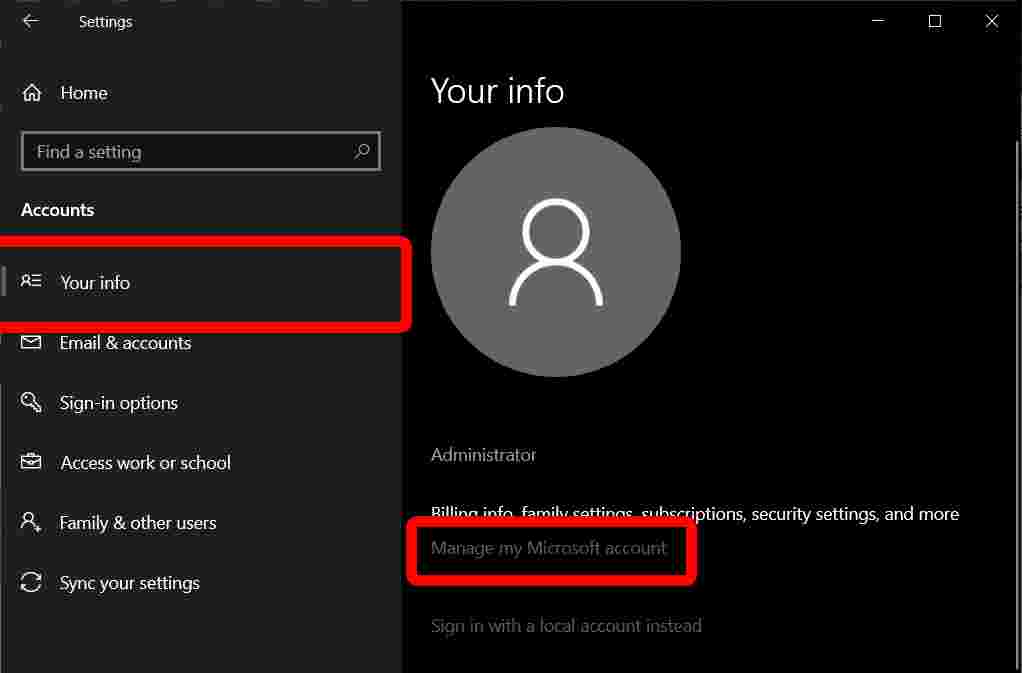
3. Then click Accounts.
4. Next, click Your info. You can find this option on the left sidebar.
5. Click Manage my Microsoft Account. This will take you to the Microsoft account web page.
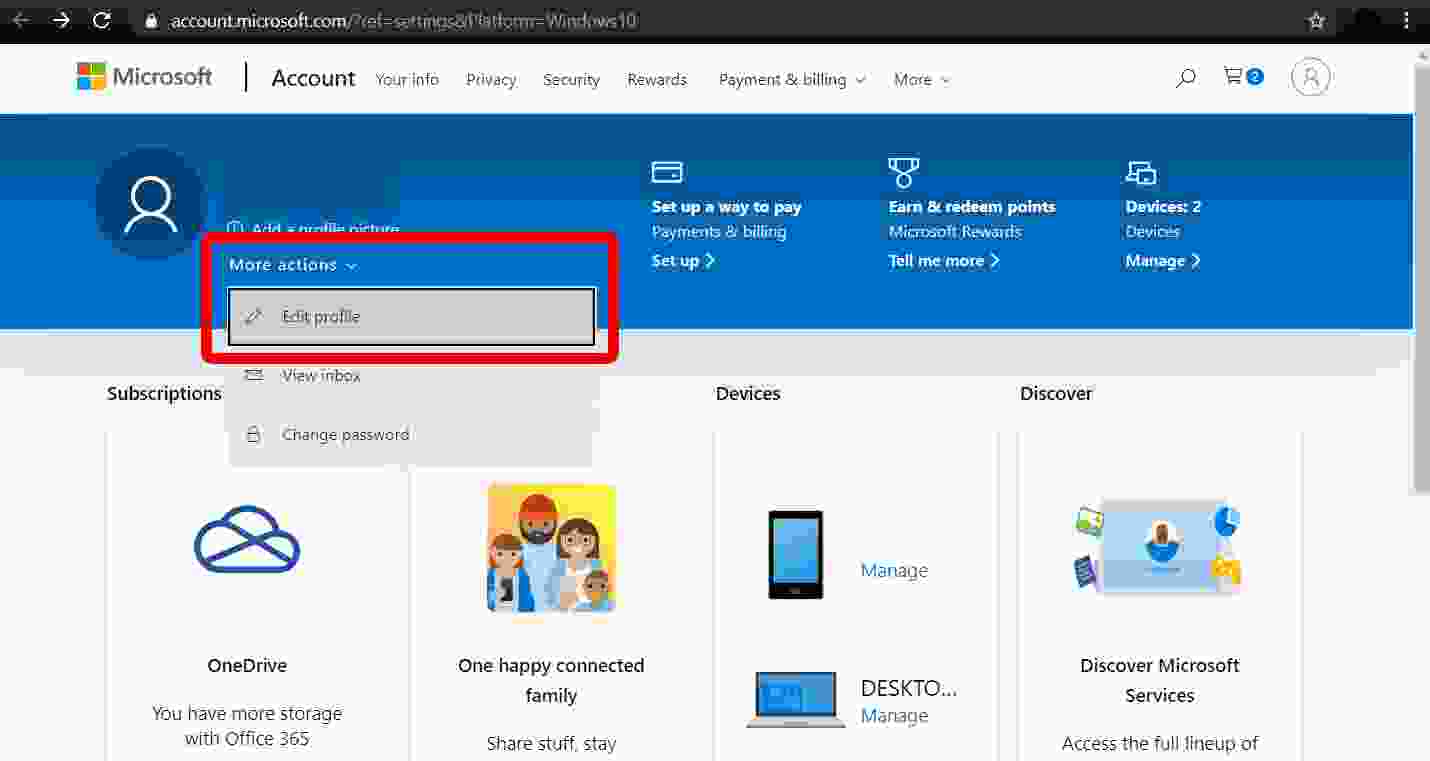
6. Then click More actions. You can find this drop-down menu next to your user account name in the top left corner.
7. Next, click Edit Profile from the drop-down menu.
8. Then click Edit names under your current account name.
9. Enter your desired new first and last name.
10. Enter the Captcha code.
11. Then click Save.
12. Restart your computer for the changes to take effect.
How to Change Windows 10 Advanced Control Panel Administrator Name
You can also change the user account name with the Advanced Control Panel, which can be accessed with certain commands. This option appears when you click the Properties of the selected user.
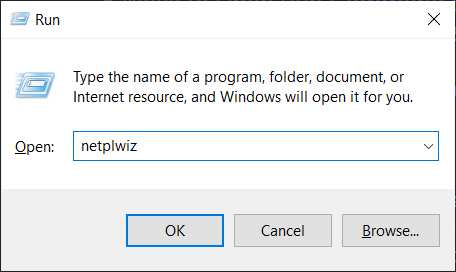
1. Press the Windows and R keys simultaneously on your keyboard. Next will open the Run command tool.
2. Type netplwiz in the Run command tool.
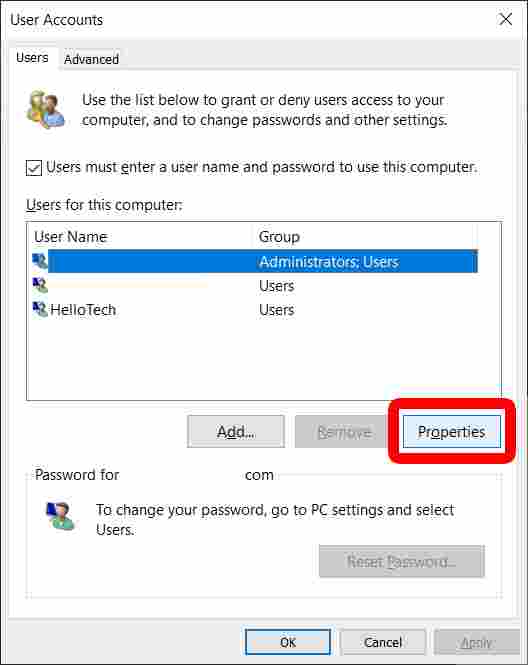
3. Select the account you wish to rename.
4. Then click Properties.
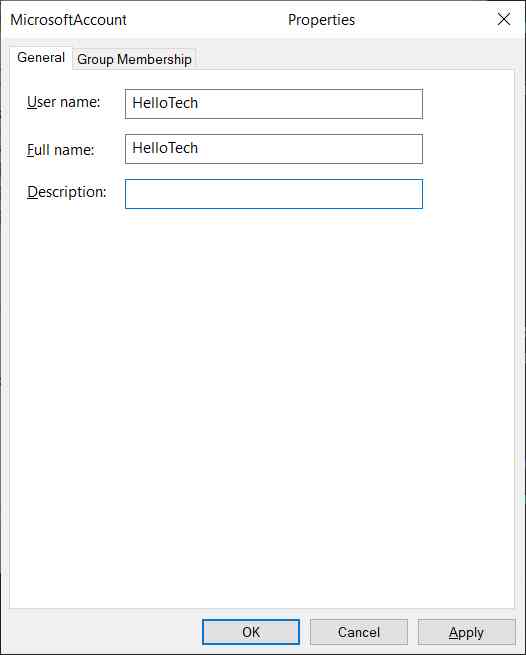
5. Type the new user name in the box under the General tab.
6. Click OK.
7. Click OK again in the User Accounts Panel.
If you want to change the name of the local account, you must do it through Control Panel. Here’s how:
How to Change Windows 10 Administrator Name via Control Panel
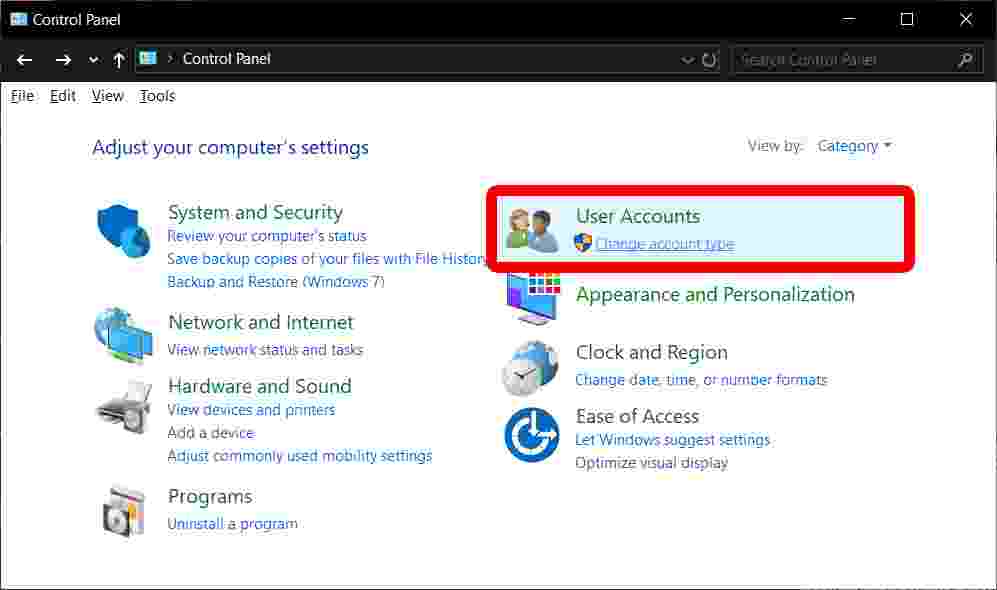
If you want to change the Administrator name that is not linked to a Microsoft Account, you can open the Control Panel and click Change account type.
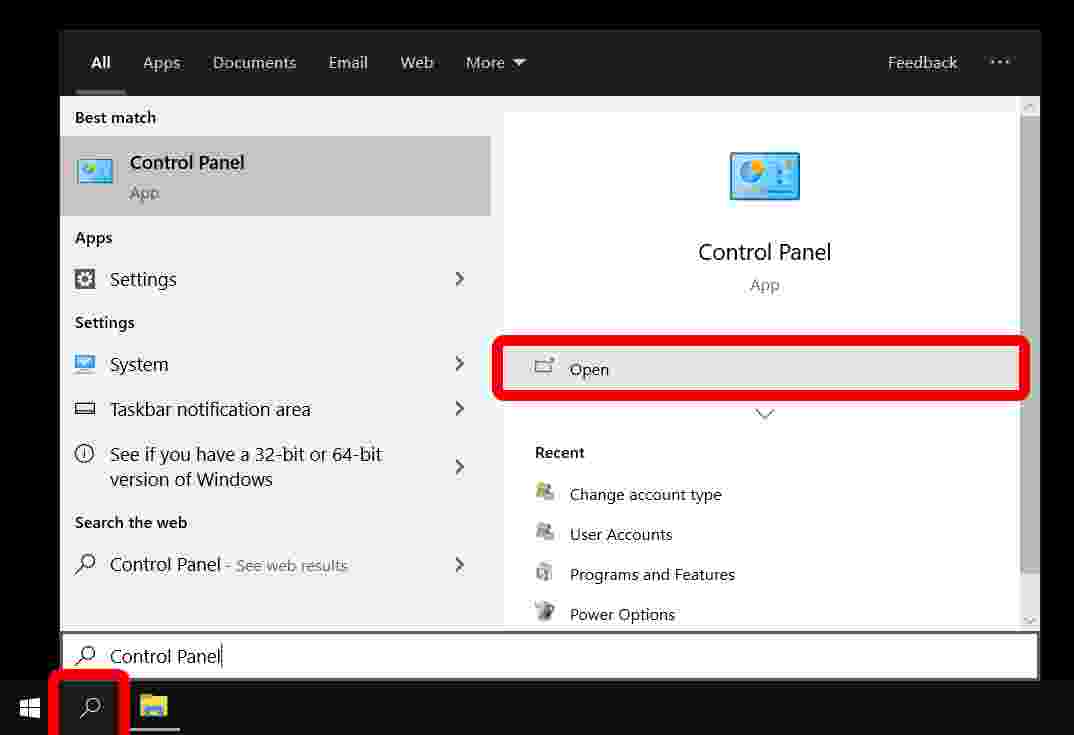
1. Type Control Panel into the Windows Search Bar. You will find it by clicking on the magnifying glass icon in the lower-left corner of your screen.
2. Then click Open.
3. Click Change the account type at the bottom of Use Accounts
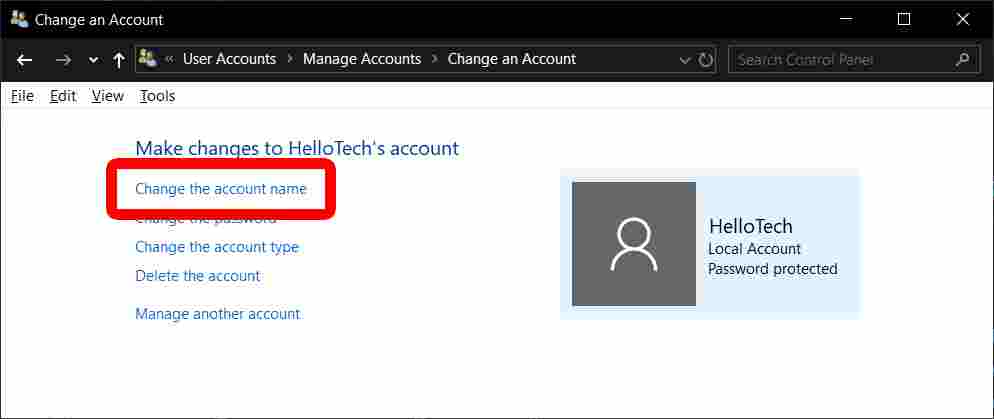
4. Select the user account you want to rename.
5. Click Change account name.
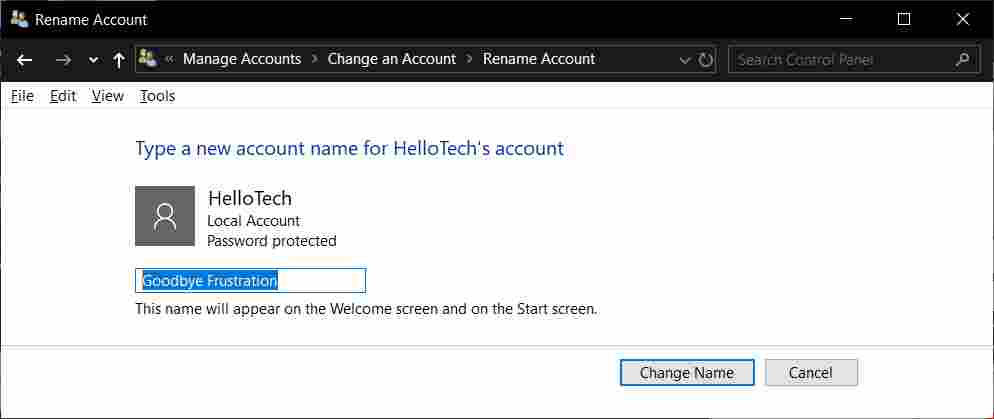
6. Type a name for the new user account in the box
7. Finally, click Change Name. Your changes will appear when you return to the previous screen.
Read more:
![8 Ways to Fix The Hosted Network Couldn’t Be Started in Windows 10 [2026] 8 Ways to Fix The Hosted Network Couldn't Be Started in Windows 10](https://technowizah.com/wp-content/uploads/2021/07/8-Ways-to-Fix-The-Hosted-Network-Couldnt-Be-Started-in-Windows-10.jpg)


